Finger Admin Dashboard User Manual
User Manual
| 1.0 | Setting Up |
| 1.1 | Log in to Finger Admin Dashboard |
| 2.0 | Items |
| 2.1 | Items Lists |
| 2.2 | Add Item |
| 2.3 | Categories List |
| 3.0 | Modifiers |
| 3.1 | Modifiers List |
| 3.2 | Add Modifier |
| 4.0 | Table |
| 4.1 | Table List |
| 4.2 | Add Table |
| 5.0 | Outlets |
| 5.1 | Outlet List |
| 5.2 | Add Outlet |
| 6.0 | Tax |
| 6.1 | Tax List |
| 6.2 | Add Tax |
| 7.0 | Promotions |
| 7.1 | Promotion Code |
| 7.2 | Add Promotion Code |
| 7.3 | Voucher List |
| 7.4 | Add Voucher |
| 8.0 | Transactions |
| 8.1 | Sales Summary |
| 8.2 | Items Summary |
| 8.3 | Exception Sales Summary |
| 8.4 | Transactions Records |
| 9.0 | Report |
| 9.1 | Daily Sales |
| 10.0 | App Settings |
| 10.1 | POS Identifier |
| 10.2 | Operators |
| 10.3 | Kitchen Printing Assigns |
| 10.4 | Receipt Printing Template |
| 11.0 | Sales Settings |
| 11.1 | Sales Category |
| 11.2 | Refund Types |
| 11.3 | Payment Options |
| 12.0 | Company Settings |
| 13.0 | Membership |
| 13.1 | Membership Settings |
| 13.2 | Member List |
| 13.3 | Add Member |
1.0 Section: Setting Up
1.1 Log In to Finger Admin Dashboard:
1. https://fingertest.raptorpos.com/ (Paste URL in browser)
2. Enter your email and password, then sign in.
(Email: xxx@xxx.com)
(Password: xxx)
- Once you are in, you can add and edit products, manage your stores, view reports, configure POS layouts, and more.
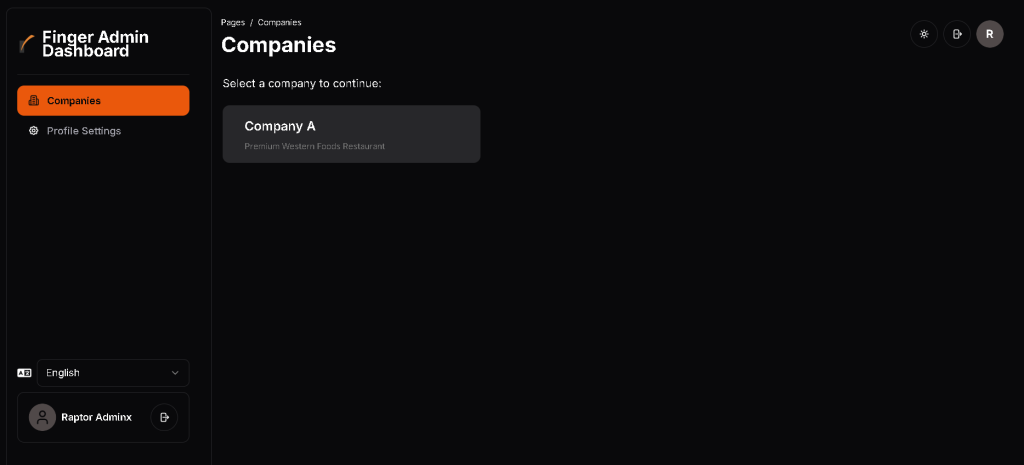
- Choose a Company.
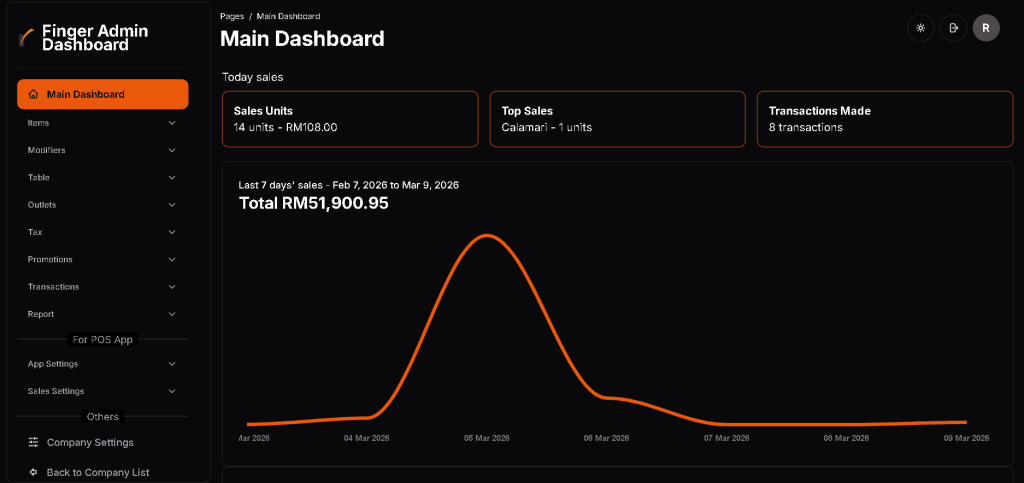
Image: Main Dashboard
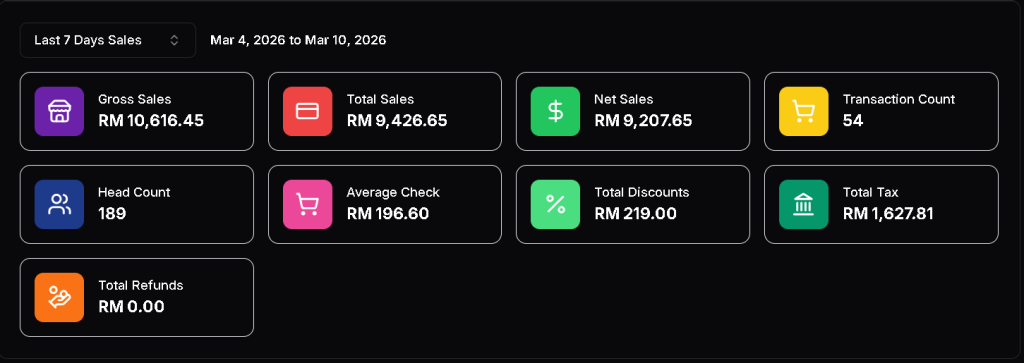
- In the Main Dashboard, users can view Gross Sales, Total Sales, Net Sales, Transaction Count, Head Count, Average Check, Total Discounts, Total Tax, and Total Refunds in a given period.
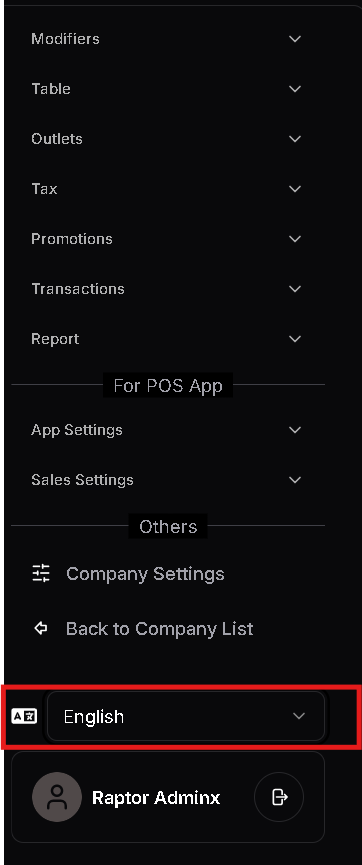
- Users can change the Language (English/ Mandarin) in the left hand menu bar.

- Users can change the Appearance Theme (Light Mode/ Dark Mode) with the feature shown in the picture above.
2.0 Section: Items
2.1 Items List:
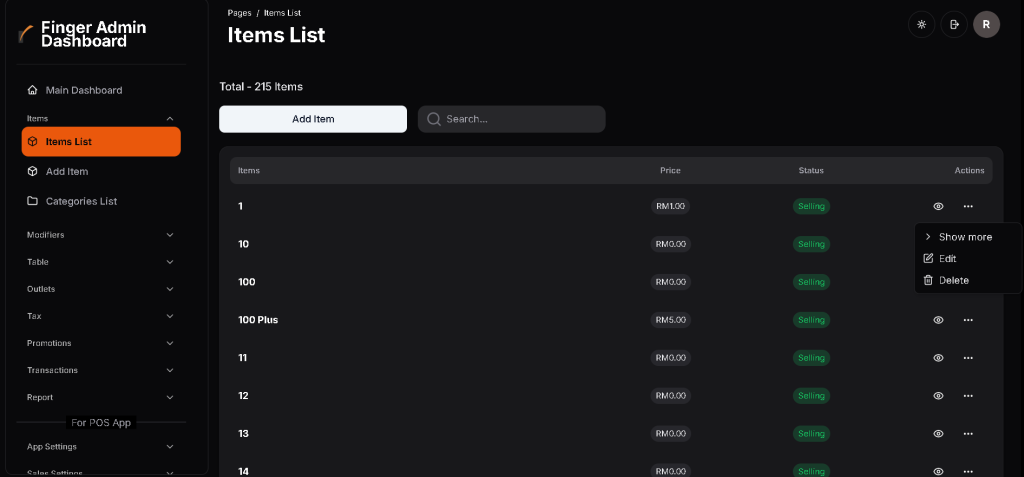
- Allows users to Search, View, Edit, Delete pre-existing items.
2.2 Add Item:
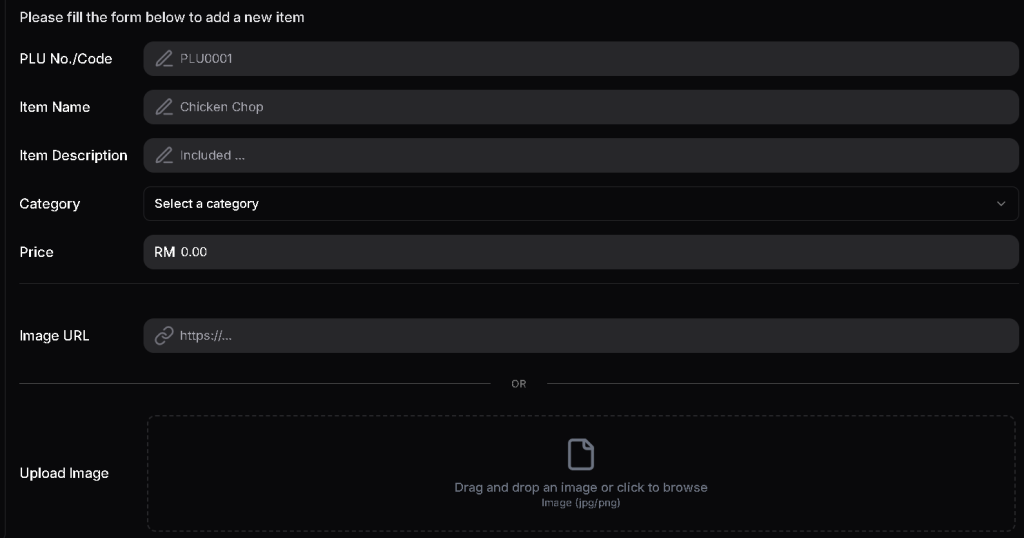
- Users can add new items by filling item PLU No, Item Name, Item Description (Optional), Category, Price, Image URL (Optional), Upload Image (Optional).

- Select modifiers for QR ordering.
- Choose item settings/ box color.
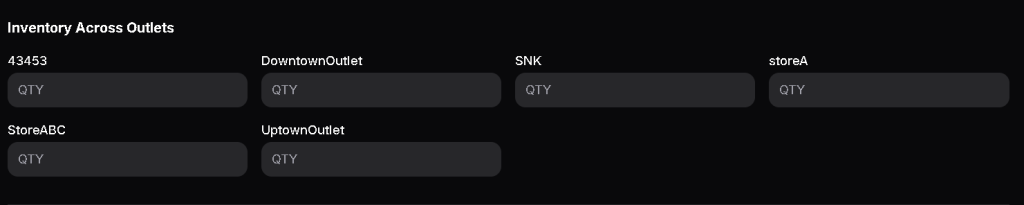
- Allow users to quantify inventory across multiple outlets.
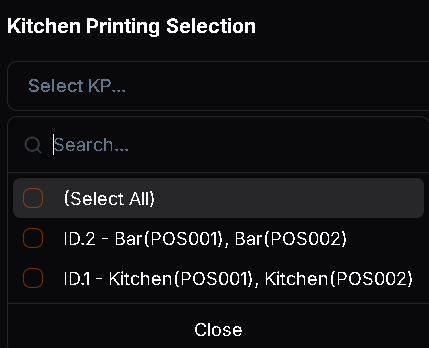
- Select kitchen printing selection.

- Select pre-created tax options.
2.3 Categories List:
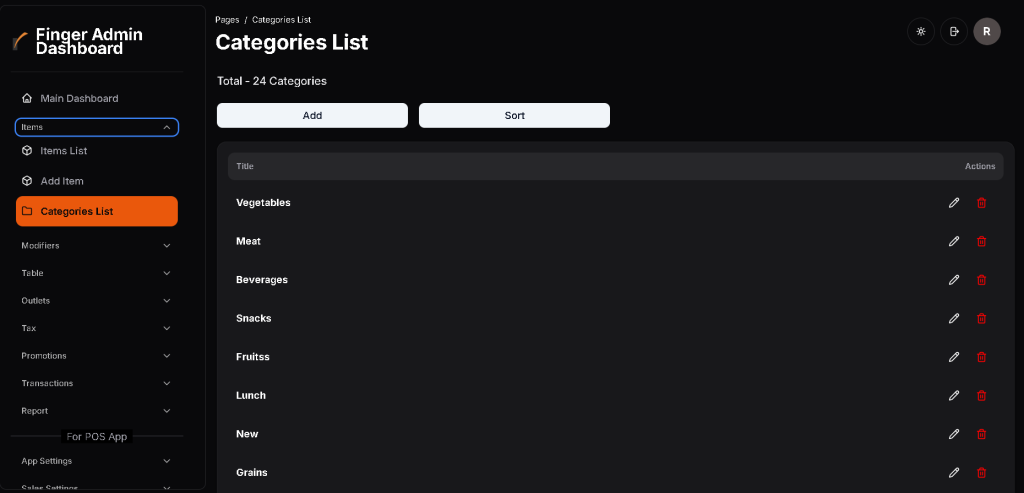
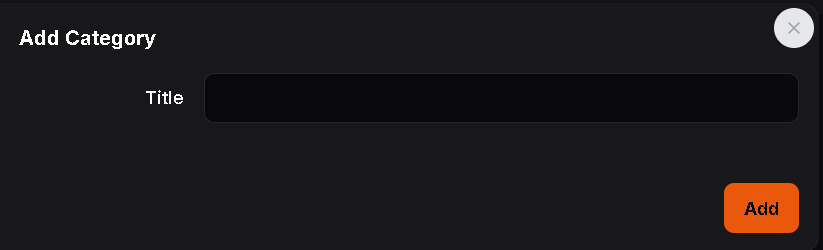
- Users can Add Categories by giving it a title.
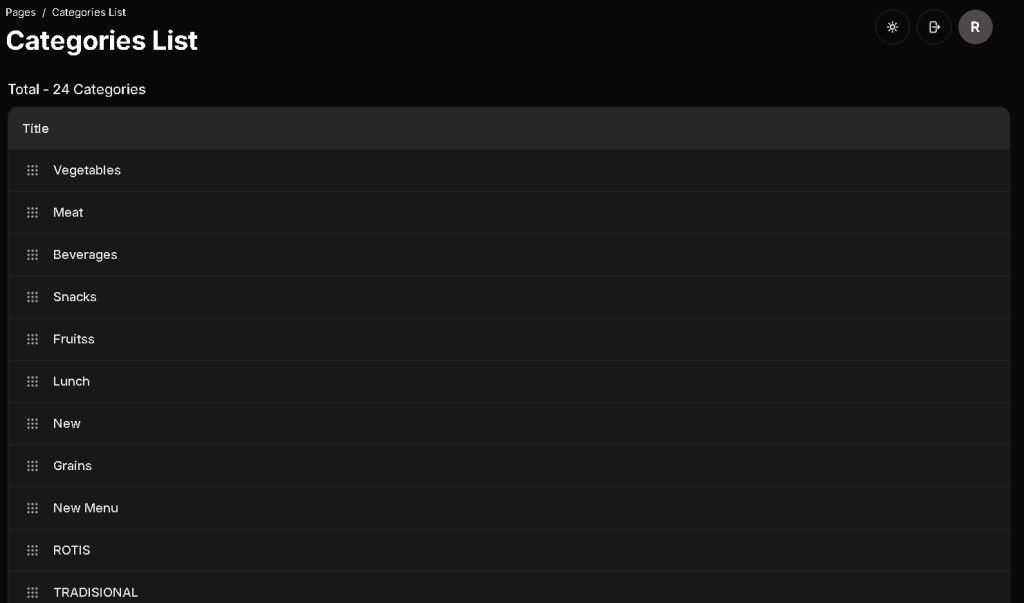
Categories can be sorted by dragging them around.
3.0 Section: Modifiers
3.1 Modifiers List:
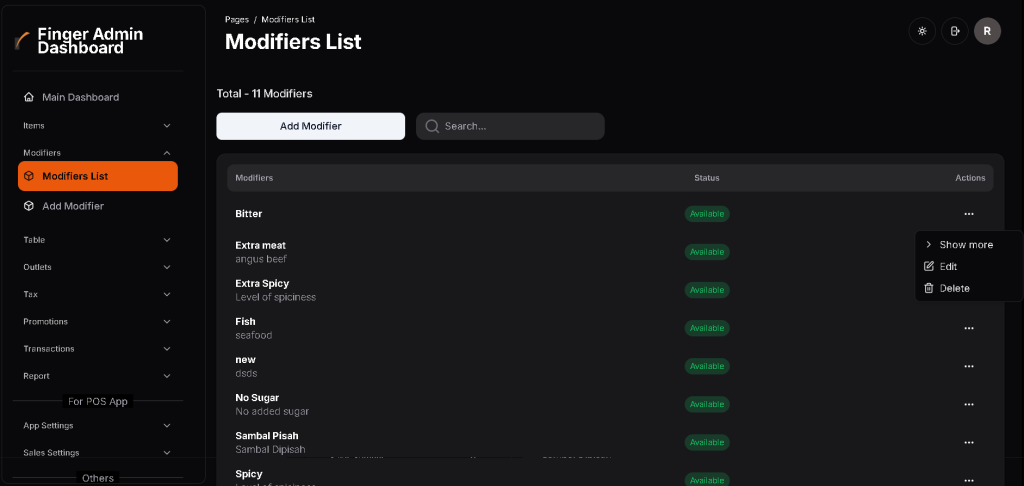
- Users can Search, View, Edit, and Delete, pre-existing modifiers.
3.2 Add Modifier:
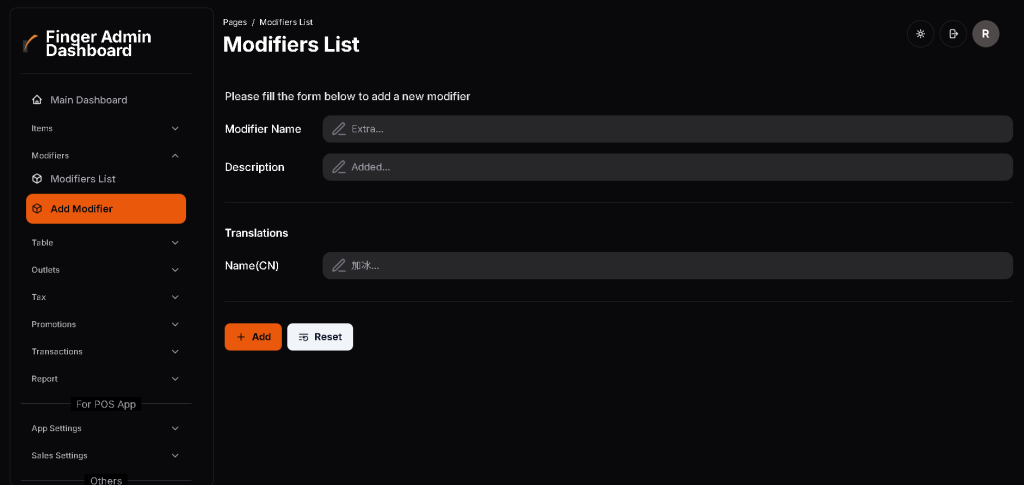
- Users can add modifiers by giving them a Modifier Name, Description (Optional), Translation (Optional).
4.0 Section: Table
4.1 Table List:
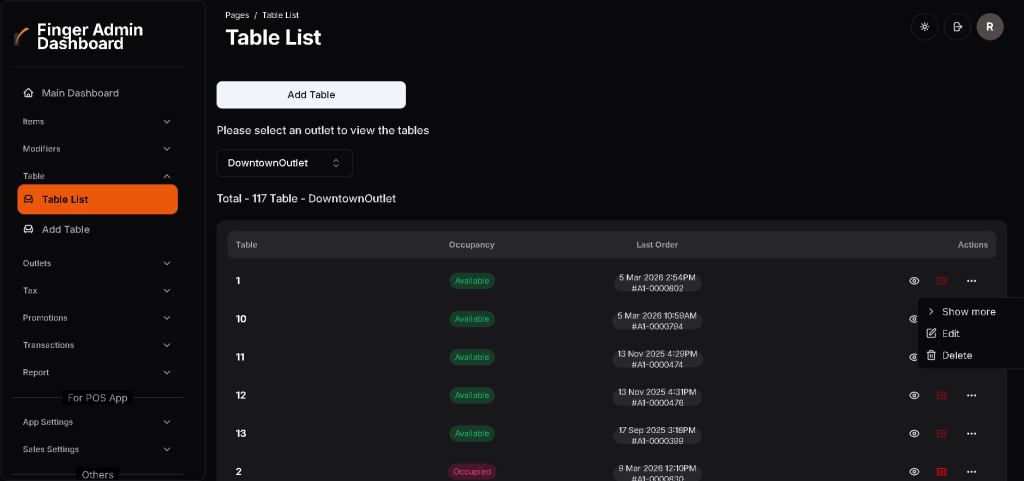
- Users can View, Edit, and Delete, pre-existing tables.
4.2 Add Table:
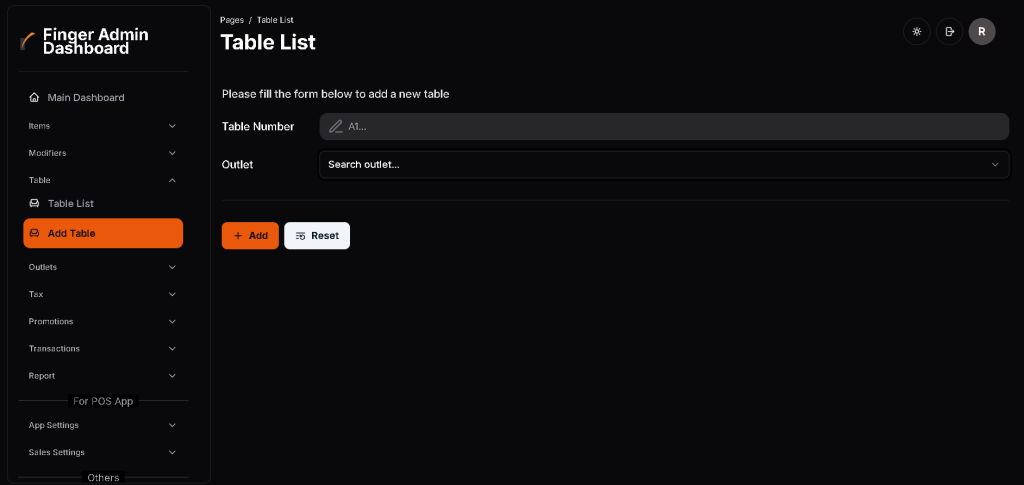
- Tables can be added when given a Table Number, and selected Outlet.
5.0 Section: Outlets
5.1 Outlet List:
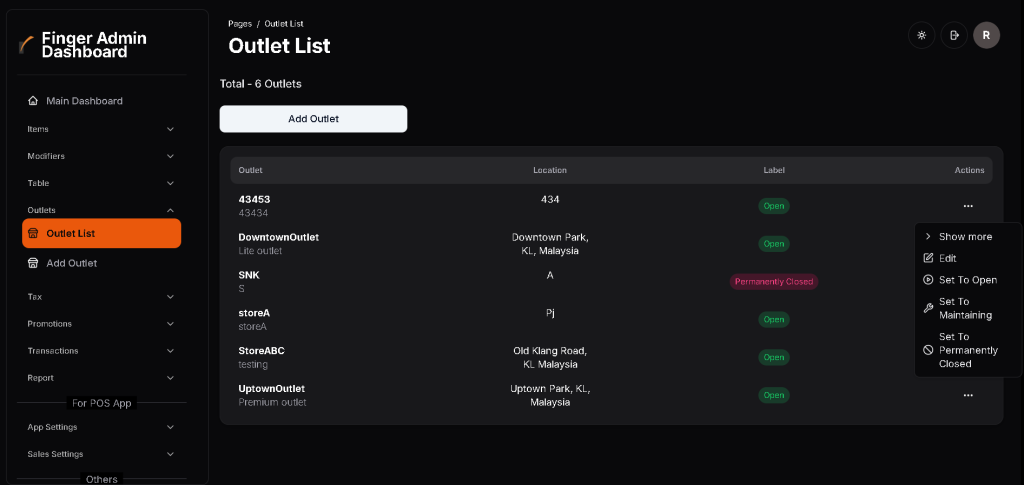
- Pre-existing Outlets will be displayed, and users can View, and Edit (Change Outlet Status) outlets.
5.2 Add Outlet:
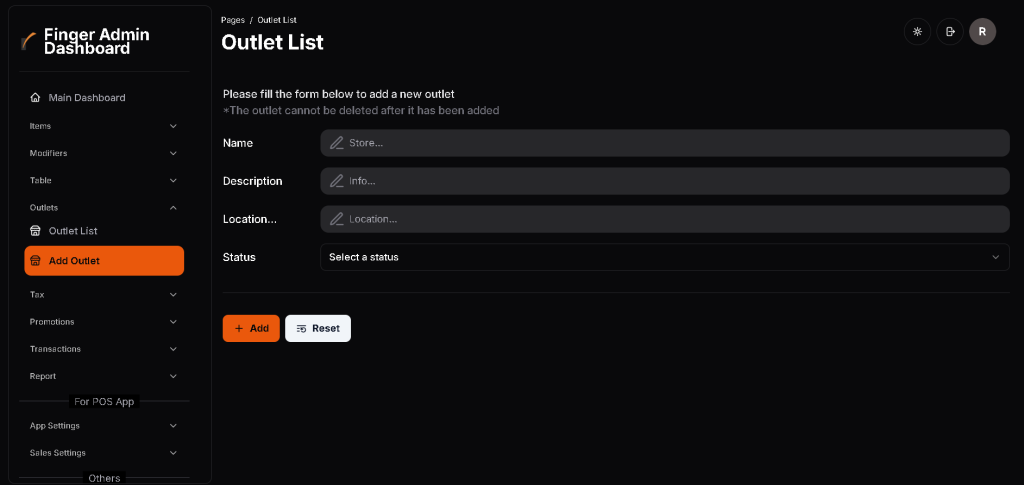
- Outlets can be added when given a Name, Description (Optional), Location, Status.
6.0 Section: Tax
6.1 Tax List:
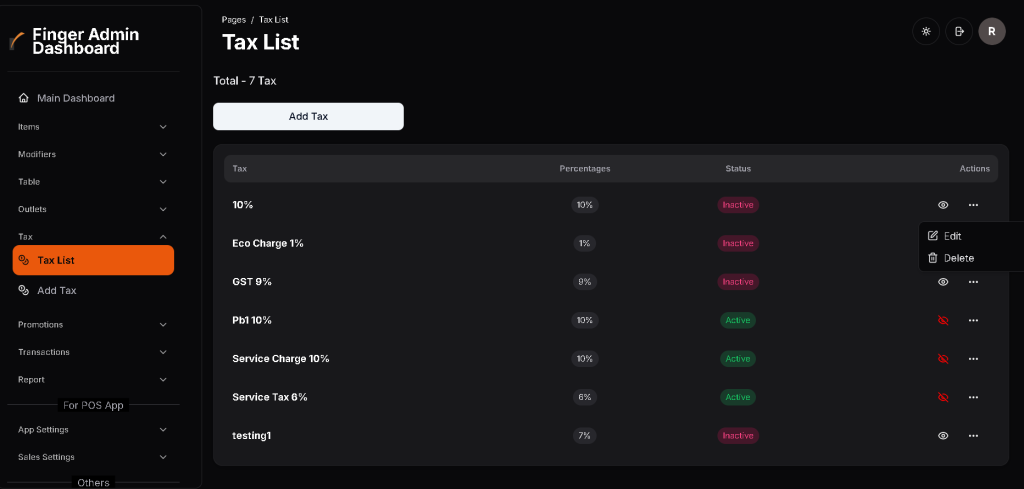
- Pre-existing Taxes will be displayed, and users can View, Edit, and Delete Taxes.
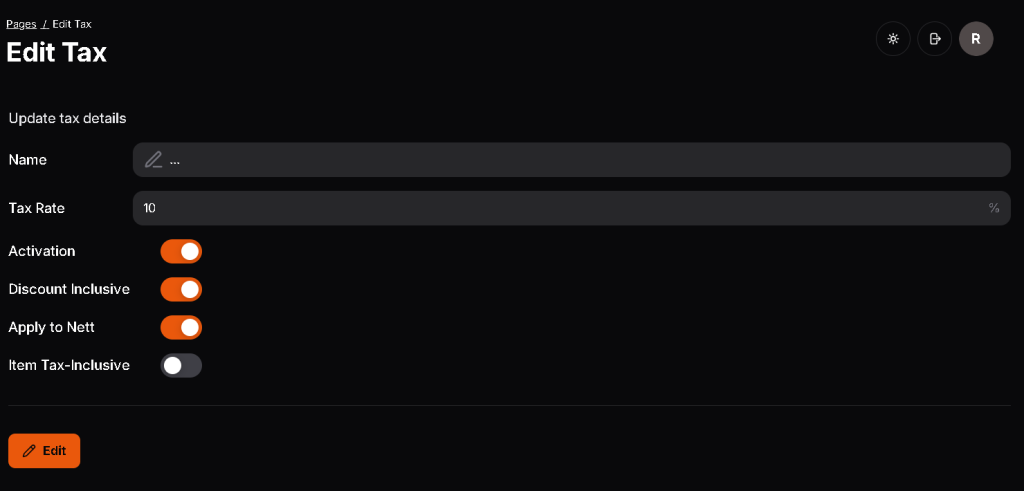
6.2 Add Tax:
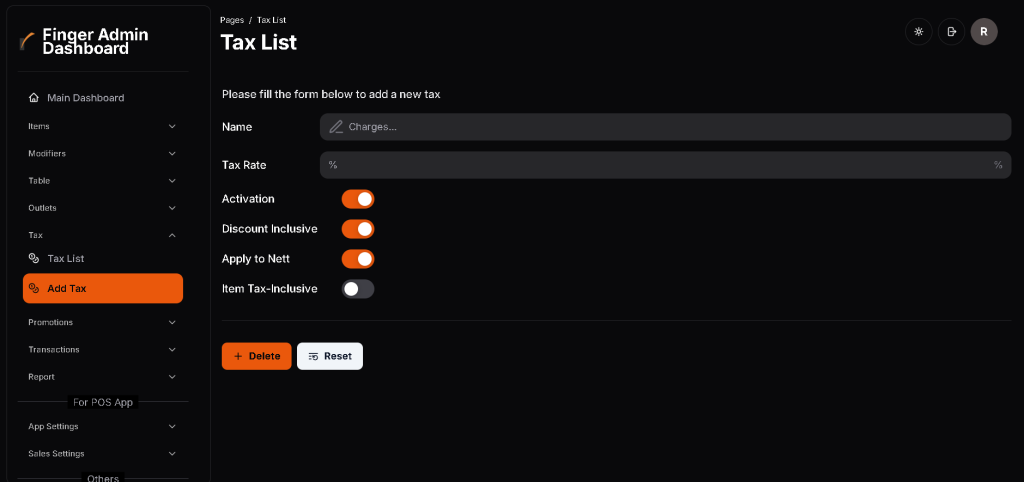
- Taxes can be added by giving them a Name, and Tax Rate.
- Activation, Discount Inclusive, Apply to Nett, and Item Tax-Inclusive options can also be set.
7.0 Section: Promotions
7.1 Promotion Code:
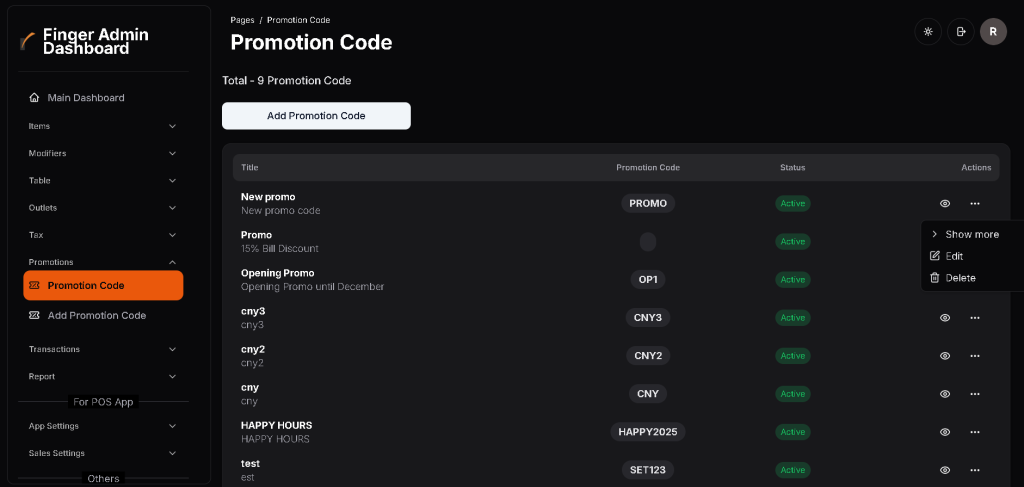
- Users can Search, View, Edit, and Delete, pre-existing Promotion Codes.
- Promotion Codes can be set active or inactive.
7.2 Add Promotion Code:
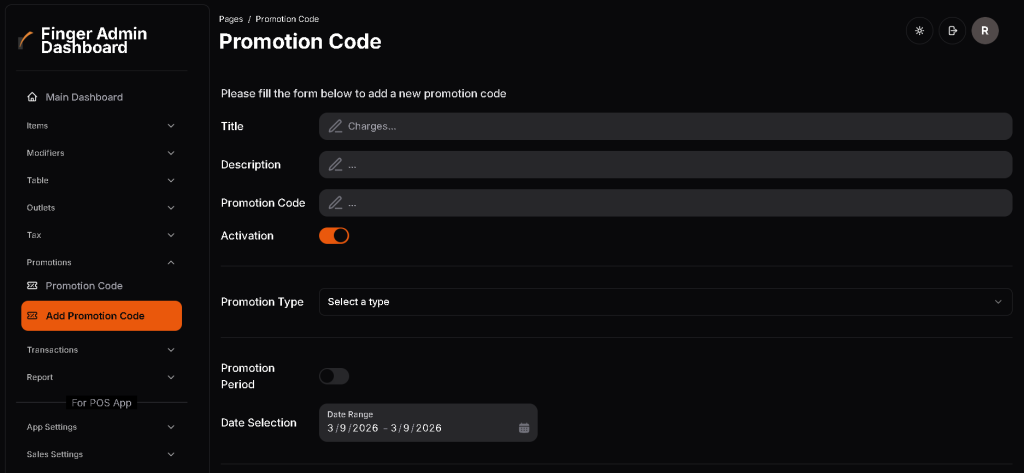
- Promotion Codes can be added when given a Title, Description (Optional), and Promotion Code (Eg: PROMO123).
- Promotion can be set to active or inactive.
- Promotion Type (Fixed Amount/ Percentage) can be selected.
- Promotion Period can also be set.
7.3 Voucher List:
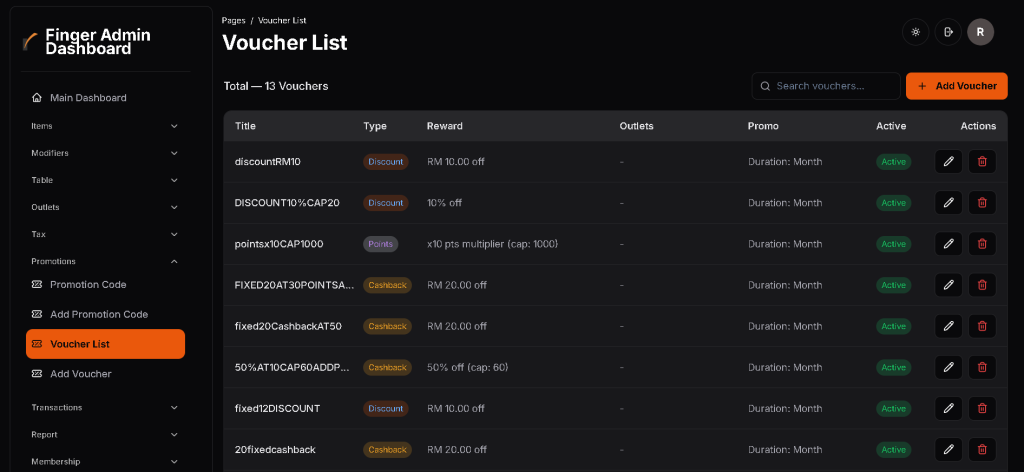
- Users can Search, View, Edit, and Delete, pre-existing Vouchers.
- Vouchers can be set active or inactive.
7.4 Add Voucher:
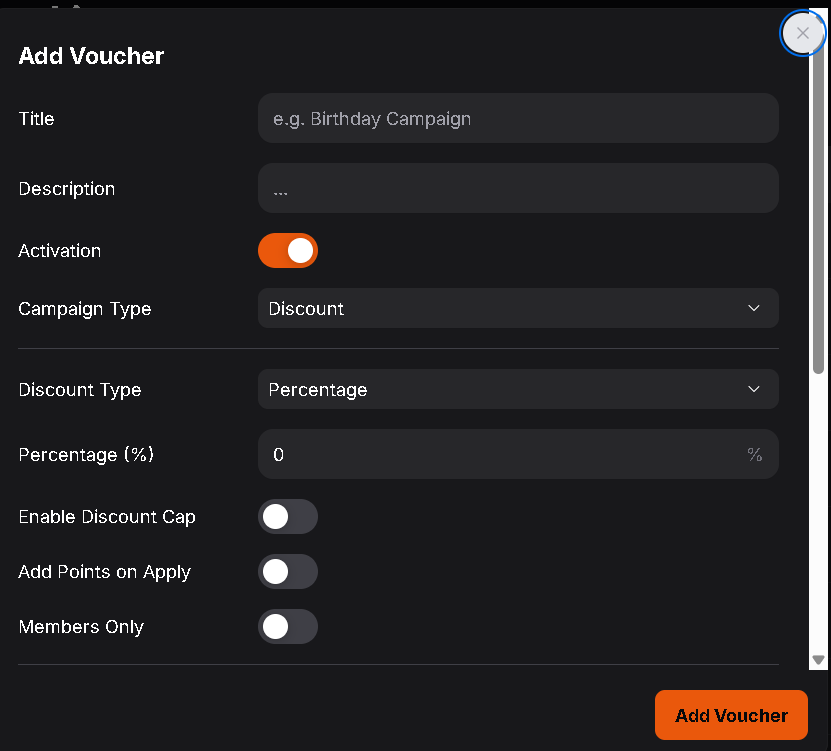
- Vouchers can be added when given a Title, and Description (Optional).
- Vouchers can be set to active or inactive.
- Campaign Type (Discount/ Cashback/ Points) can be selected.
- Minimum Spent Amount can also be set.
- Use Duration can be set.
- Can Allow Stacking.
- Can set the amount of Uses.
8.0 Section: Transactions
8.1 Sales Summary:
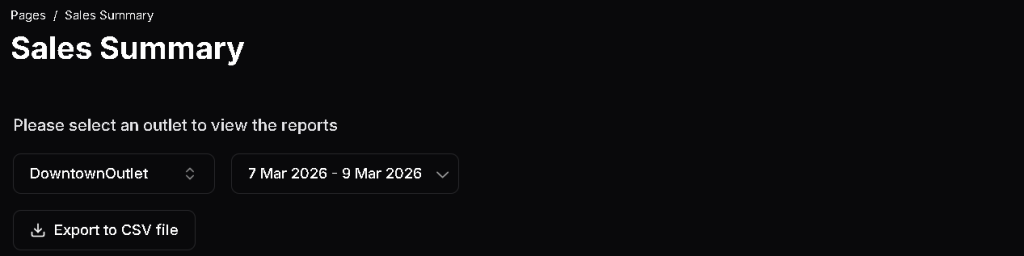
- After Outlet and Period is selected, Sales Summary can be displayed or be exported to a CSV file.
8.2 Items Summary:
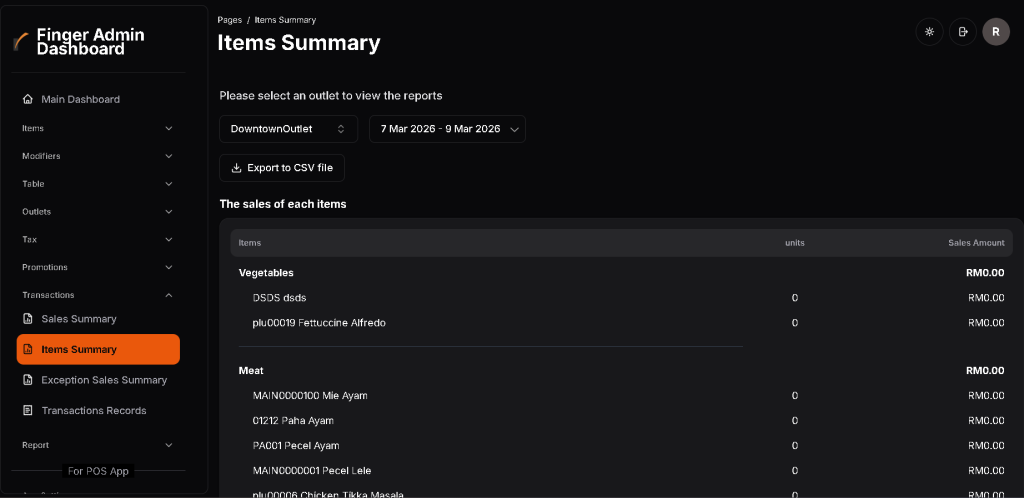
- Items Summary displays the sales of each item in the Items List, when Outlet and Period is selected.
- Items Summary can also be exported to a CSV file.
8.3 Exception Sales Summary:
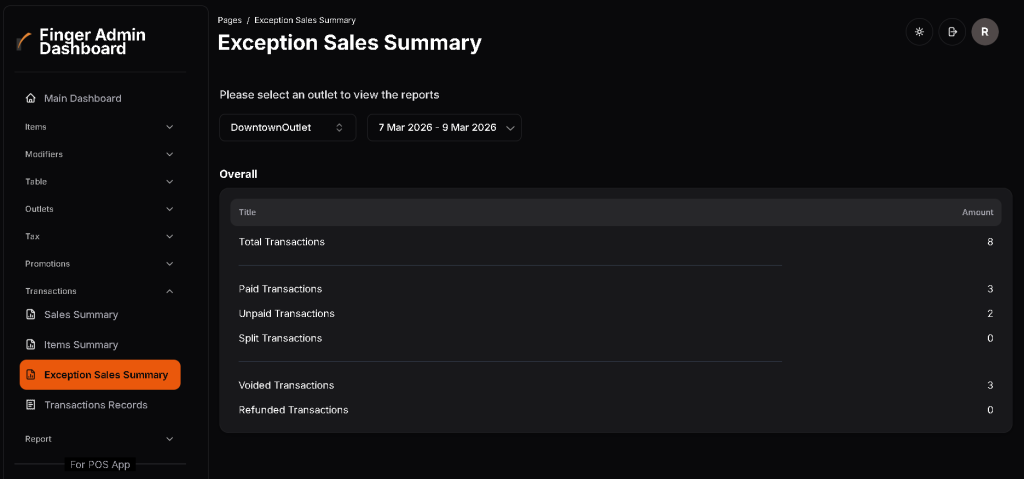
- Exception Sales Summary displays amounts of Paid Transactions, Unpaid Transactions, Split Transactions, Voided Transactions, and Refunded Transactions, after Outlet and Period is selected.
8.4 Transactions Records:
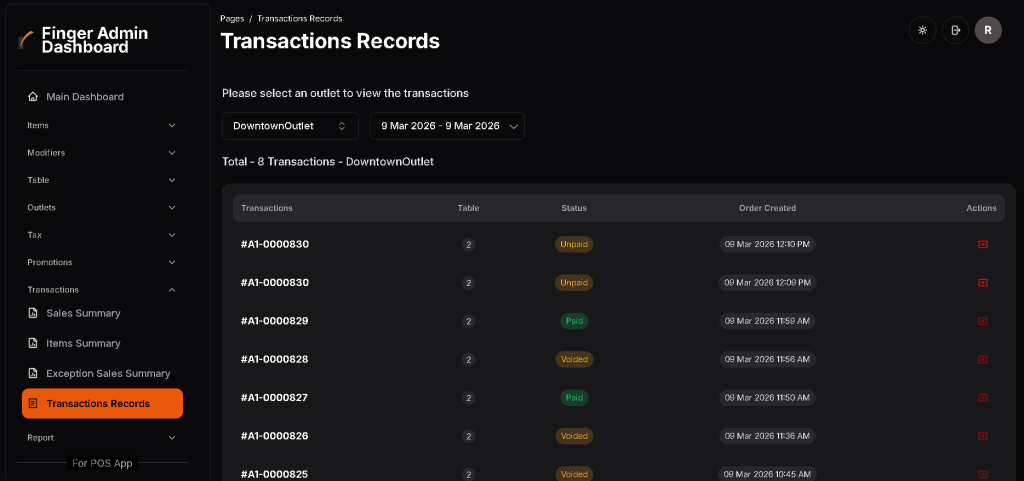
- After Outlet and Period is selected, Transactions Records will display all transactions made in the selected outlet and period.
- Transactions will be displayed with Transaction Number, Table Number, Status, date and time of Order Created.
- Users can close unpaid orders.
9.0 Section: Report
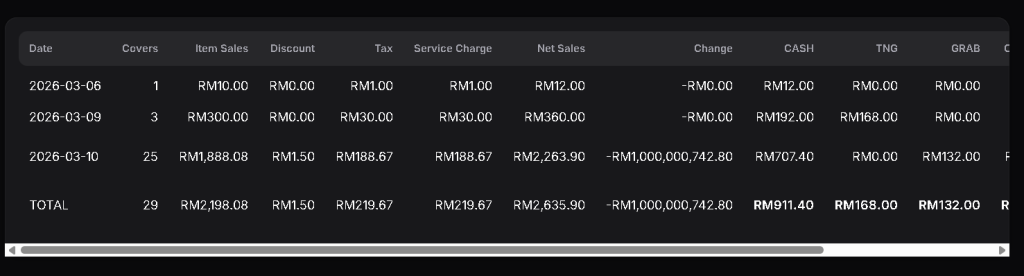
9.1 Daily Sales:
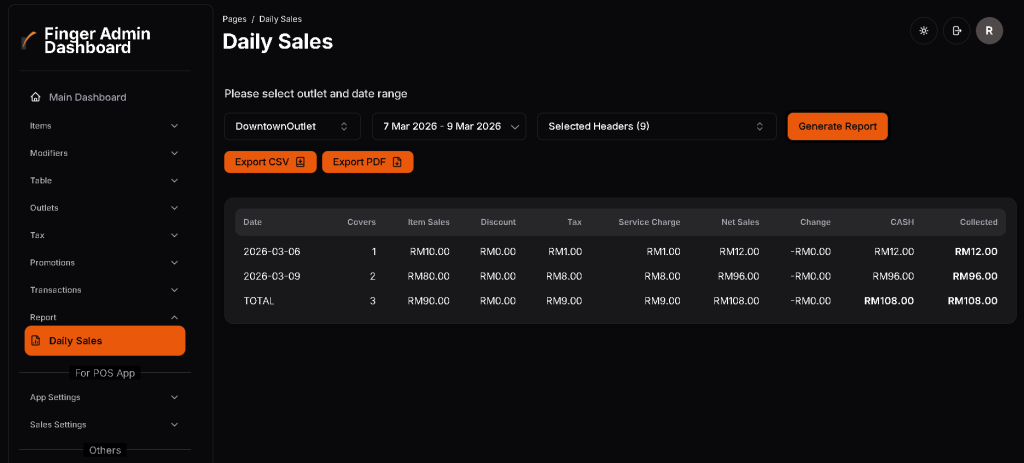
- Daily Sales are displayed, when Outlet, Period, and Headers are selected.
- Headers include: Date, Covers, Item Sales, Discount, Tax, Service Charge, Net Sales, Change and Payment Method.
- Daily Sales generated can be exported to CSV or PDF files.
10.0 Section: App Settings
10.1 POS Identifier:
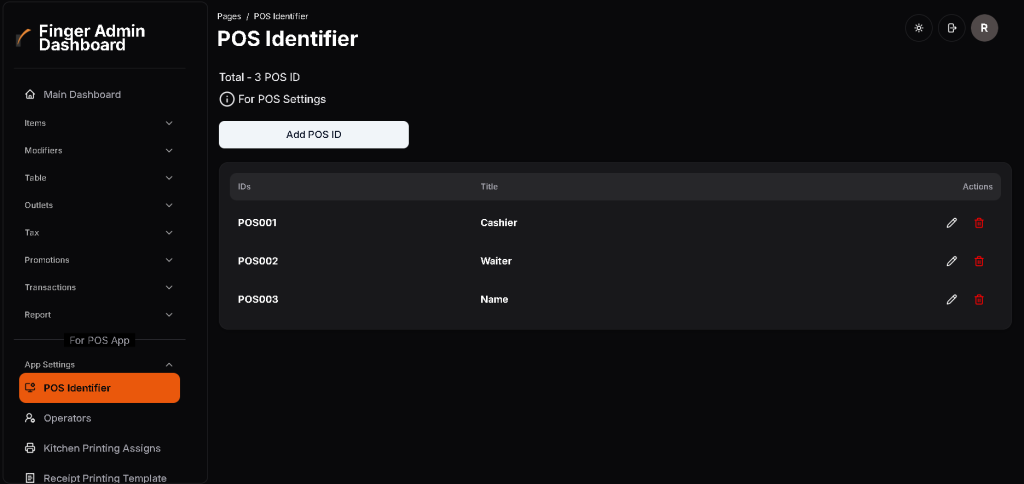
- Users can Add, Edit, and Delete pre-existing POS IDs.
- POS IDs are added by giving them an ID, Pos Title, assigning Table Type and choosing status of Auto Assign Table Number (Active/ Inactive).
10.2 Operators:
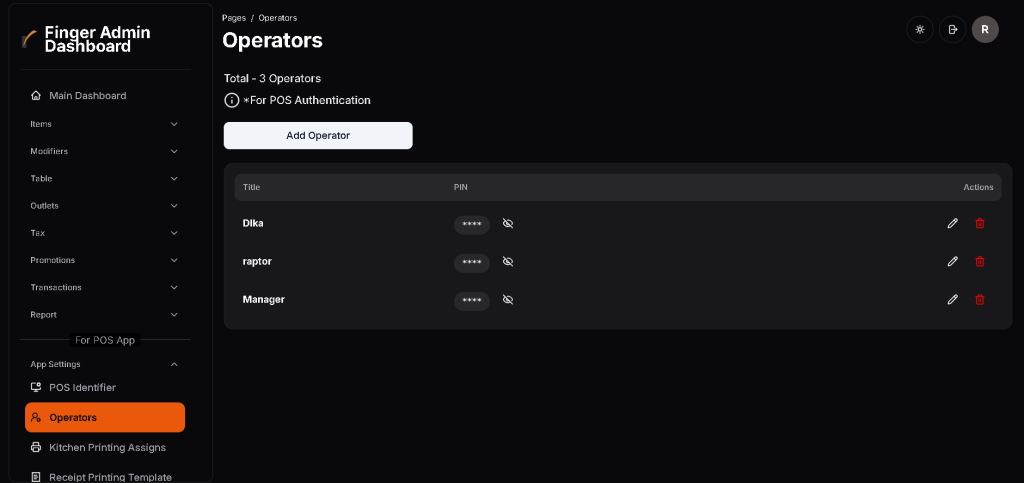
- Users can Add, Edit, and Delete pre-existing Operators.
- Operators are added by giving them an Operator Title, and PIN.
- Operators can be given various permissions of operation: Give Manager Level, Able to Perform Transfer Table, Able to Perform Refund, Able to Perform Reprint Receipt, Able to View Transactions, Able to Split Bills, and Able to Perform Discount (Amount/ Percentage).
10.3 Kitchen Printing Assigns:
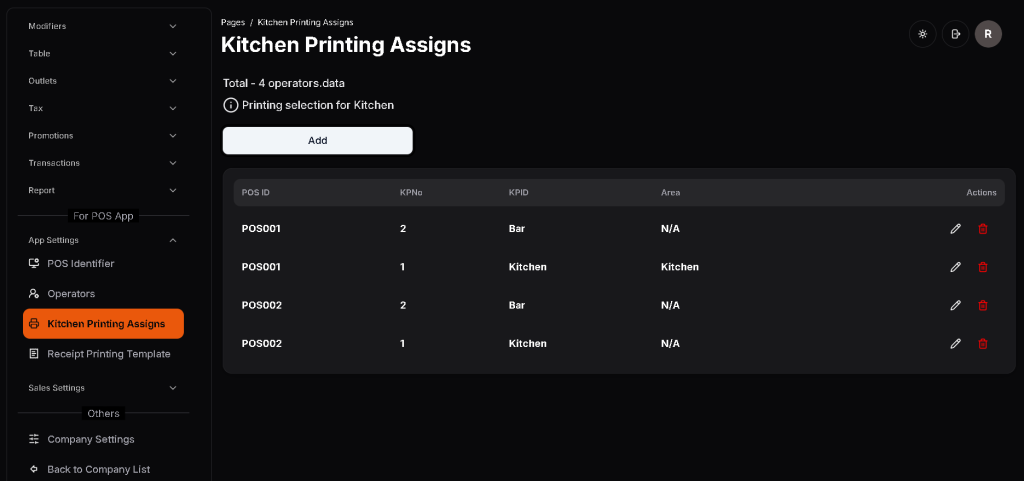
- Kitchen Printing Assigns allows users to assign POS IDs to their printer.
- Users can Add, Edit, and Delete Kitchen Printing Assignments.
- Users can make Kitchen Printer Assignments for POS printing by entering POS ID, KPNo, KPID (Title), and Area.
10.4 Receipt Printing Template:
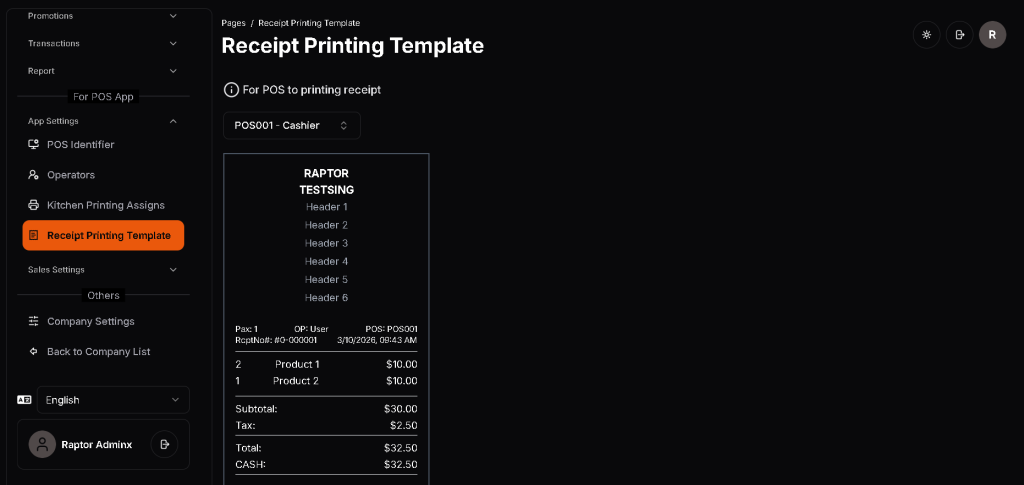
- Users can customise and Edit the Receipt Printing Template by selecting the POS ID’s printing template that they want to edit.
11.0 Section: Sales Settings
11.1 Sales Category:
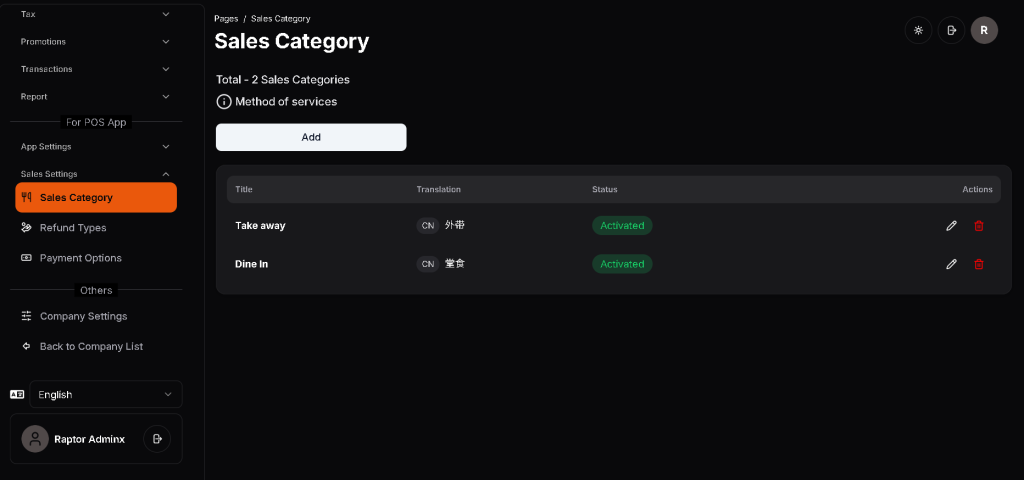
- Users can Edit, and Delete pre-existing Sales Categories.
- Sales Categories are added when given a Title, Translation of Title (Optional), Status (Active/ Inactive), and Applicable Taxes.
11.2 Refund Types:
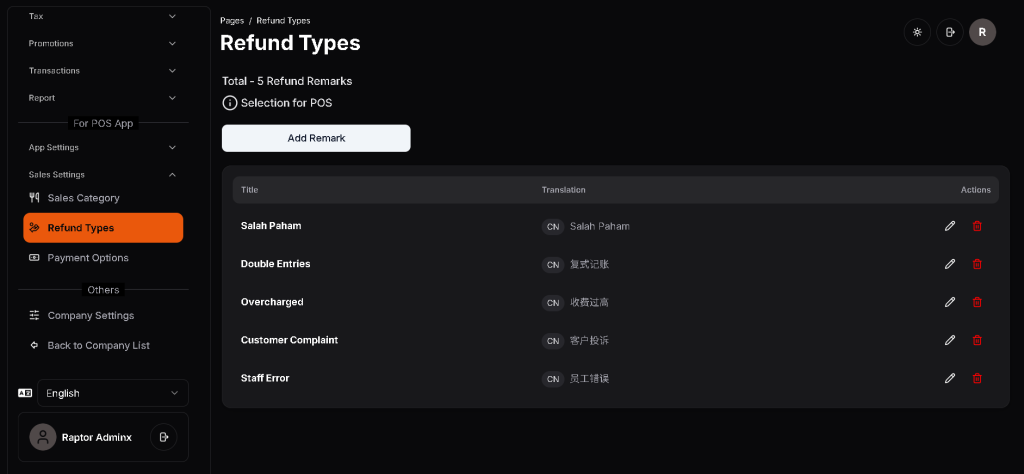
- Users can Edit, and Delete pre-existing Refund Types.

- Refund Types are added when given a Refund Description, and a Translation to Refund Description (Optional).
11.3 Payment Options:
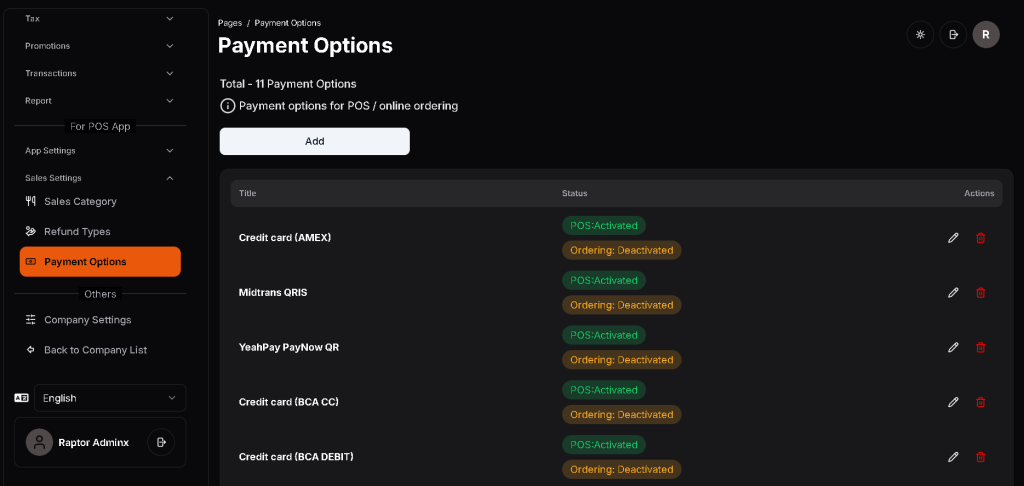
- Users can Edit, and Delete pre-existing Payment Options.
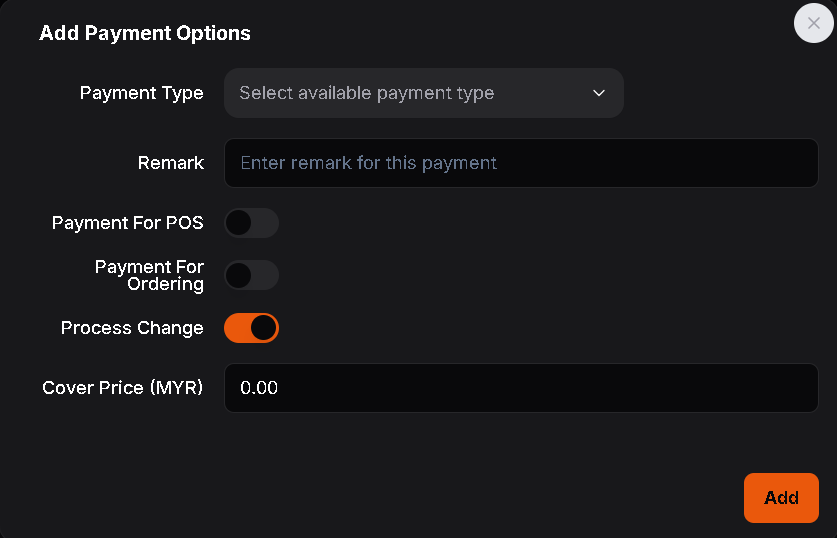
- Payment Options can be added when given a Payment Type (Cash, Credit Card, etc), Remark (Optional), and Cover Price.
- Status for Payment for POS, Payment for Ordering, and option to Process Change can be activated.
12.0 Section: Company Settings

- Company Title, Company Description, and Location can be edited in the Company Settings Section. Displayed Currency can also be selected.
13.0 Section: Membership
13.1 Membership Settings:
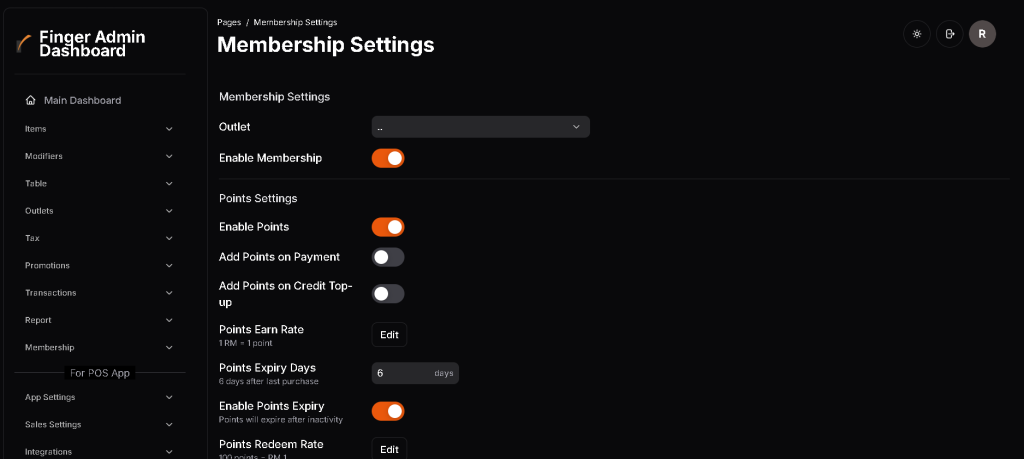
Membership Settings
This section allows you to configure membership programs, points systems, and top-up bonuses for specific outlets.
1. Outlet Selection
- Select the specific branch to configure (e.g., DowntownOutlet, SG Cafe) from the outlet list.
2. Enable Membership
- Enable Membership: Toggle ON to activate the membership program for the selected outlet.
3. Points Settings
- Enable Points: Toggle ON to activate the reward points system.
- Add Points on Payment: Customers earn points when making a purchase payment.
- Add Points on Credit Top-up: Customers earn points instantly upon recharging store credit.
- Points Earn Rate: Defines points earned per spend. (Default: 1 RM = 1 point). Click Edit to change.
- Points Expiry Days: Days before points expire after the last purchase. (Default: 6 days). Click Edit to change.
- Enable Points Expiry: Toggle ON to make points expire after a period of inactivity.
- Points Redeem Rate: Conversion rate for point redemptions. (Default: 100 points = RM 1). Click Edit to change.
4. Credit Top-up Bonus Tiers
- Set up tier-based bonus incentives when customers top up specific credit amounts (e.g., Top up RM100, get RM10 bonus).
13.2 Member List:
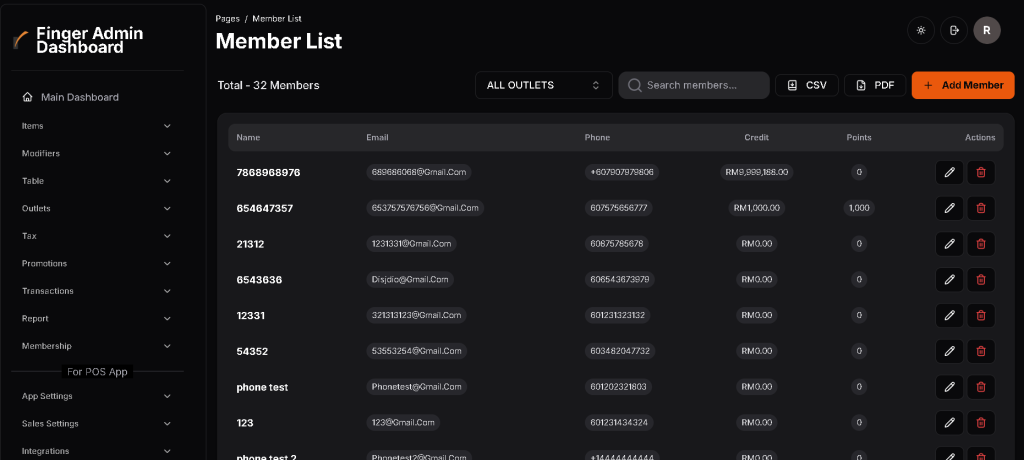
- Users can Add, Edit, and Delete pre-existing members.
- Details of Members can be exported to CSV or PDF files.
13.3 Add Member:
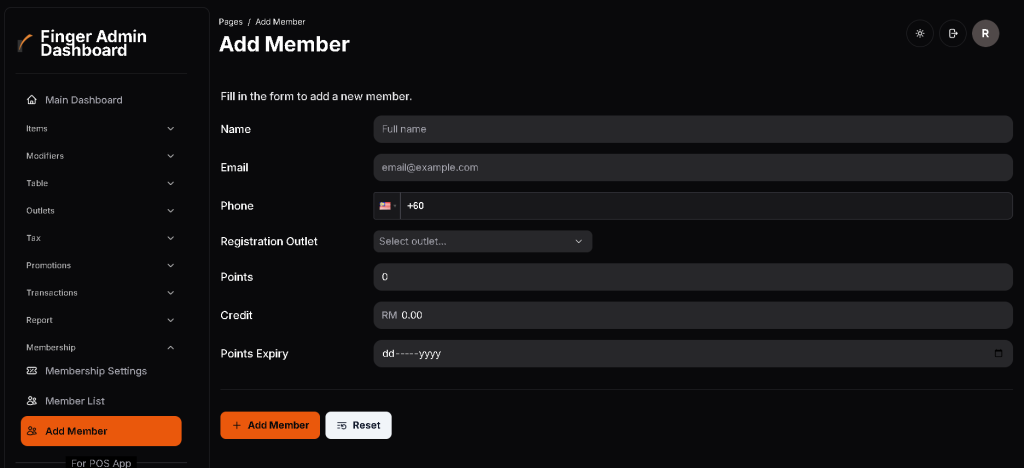
- Members can be added by giving them a Name, Email, Phone Number, Registered Outlet, Starting Points, Starting Credit, and Points Expiry Period.
Finger Admin Dashboard FAQ
FAQ 1.0 Set up Items
How to add items
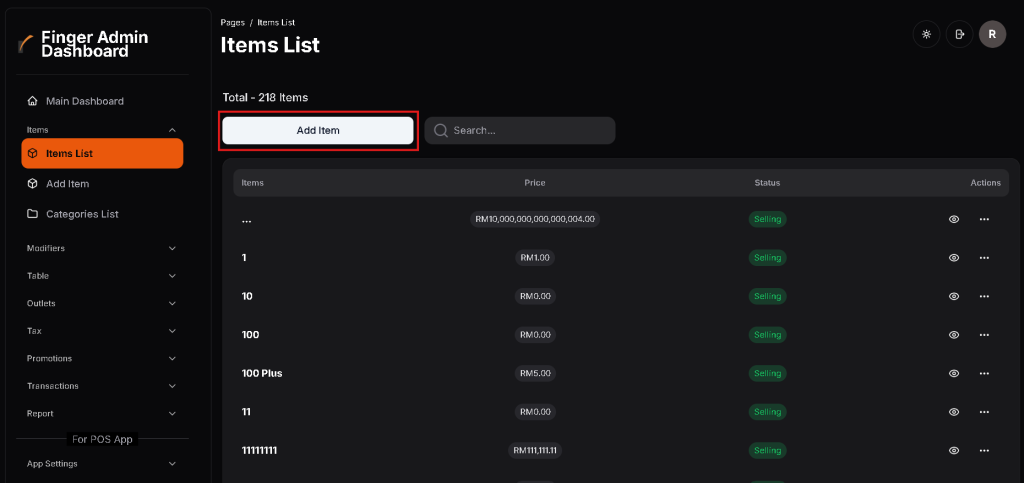
- Click on Items > Items List > Add Item.
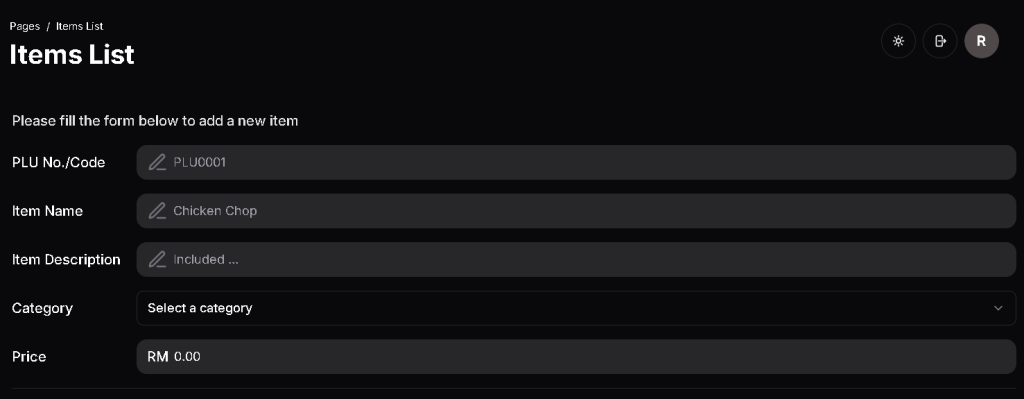
- Enter PLU No./Code (Eg. Item001)
- Enter Item Name (Eg. Milk Tea)
- Enter Item Description (Eg. No Tapioca) [Optional]
- Select Category for item
- Enter a Price
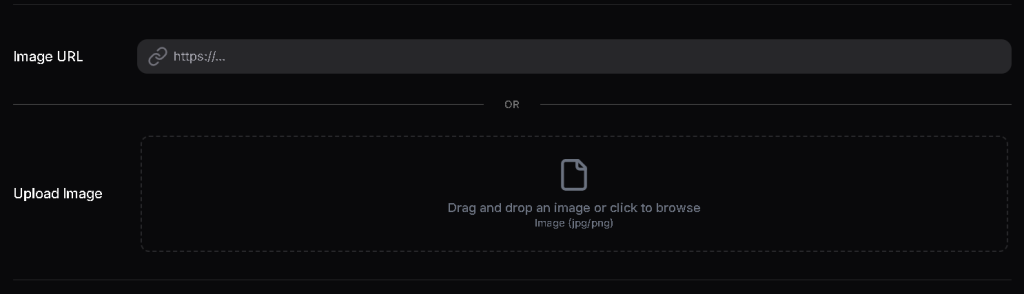
- Enter an Image URL or Upload Image [Optional]

- Select Modifiers/ Add-ons (for QR ordering) [Optional]

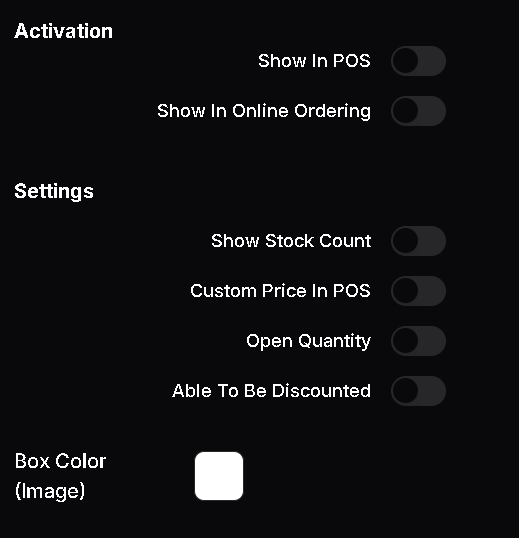
- Show in POS
- Items will show up in the Finger Application if activated.
- Show in Online Ordering
- Items will show up in the QR Ordering if activated.

- Show Stock Count
- Items will be displayed alongside its stock amount number.
- Custom Price in POS
- Users will be able to make a custom price for the item in the POS system.
- Open Quantity
- Items will have a quantified amount.
- Able to be Discounted
- Items will be available for discount options.

- Select a Box Color for the item. (Box color will be displayed in place of the item’s image if Item Frame displayed with Colors is selected in the Finger Application.)
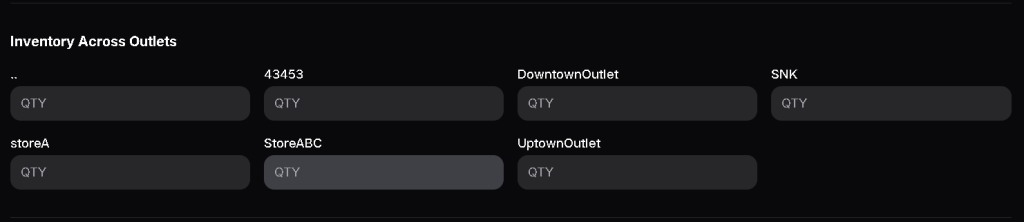
- Quantity of the item can be entered, across different outlets. (Item will be displayed alongside its quantity in the POS System) [Optional]
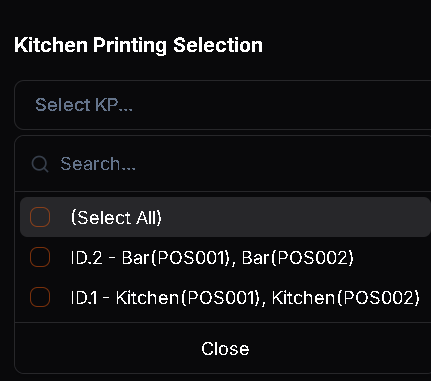
- Select for item to be printed in which printers during order.

- Select which tax options to be excluded for the item. (No exclusion if non are selected)
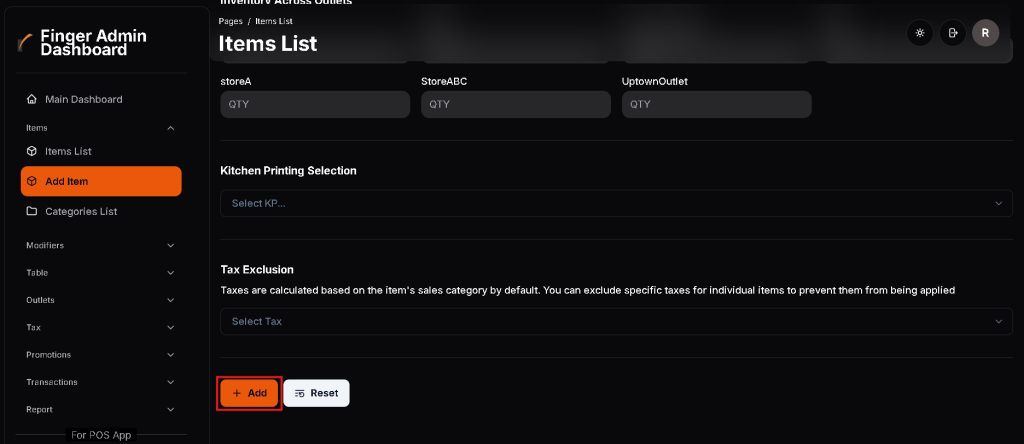
- Click Add after all necessary details are entered for Item to be added.
How to edit items
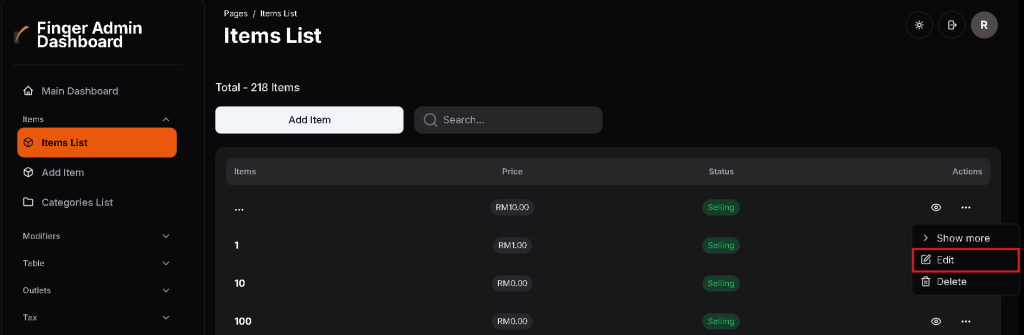
- Click on Items > Items List (find the item that you want to edit) > Actions > Edit.
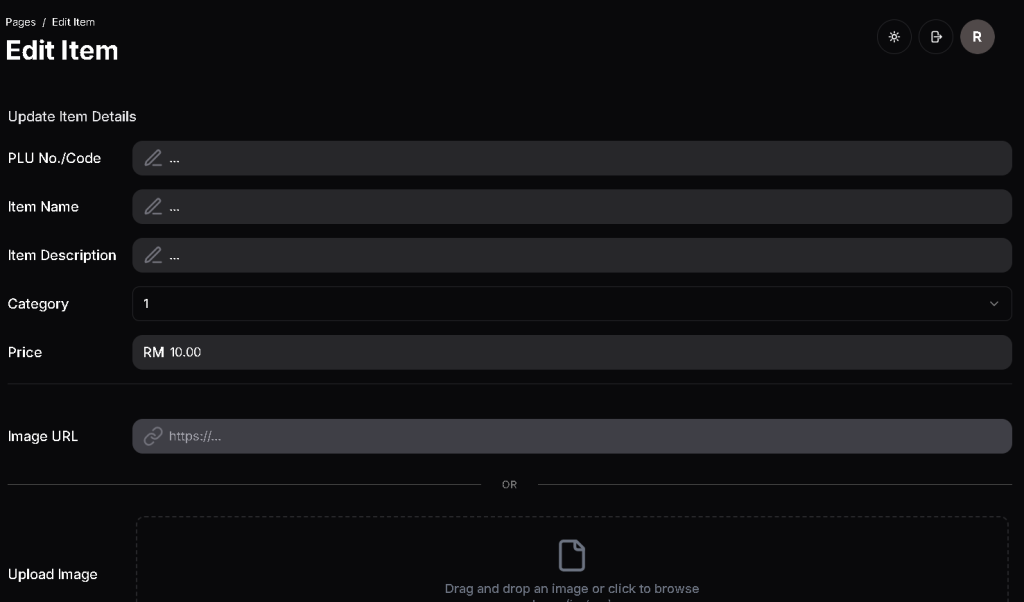
- Users will be taken to the Edit Item page.
How to delete items
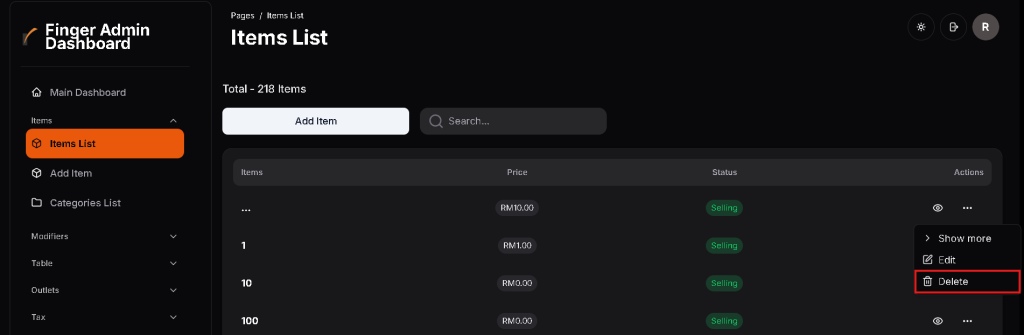
- Click on Items > Items List (find the item that you want to delete) > Actions > Delete.
How to add categories
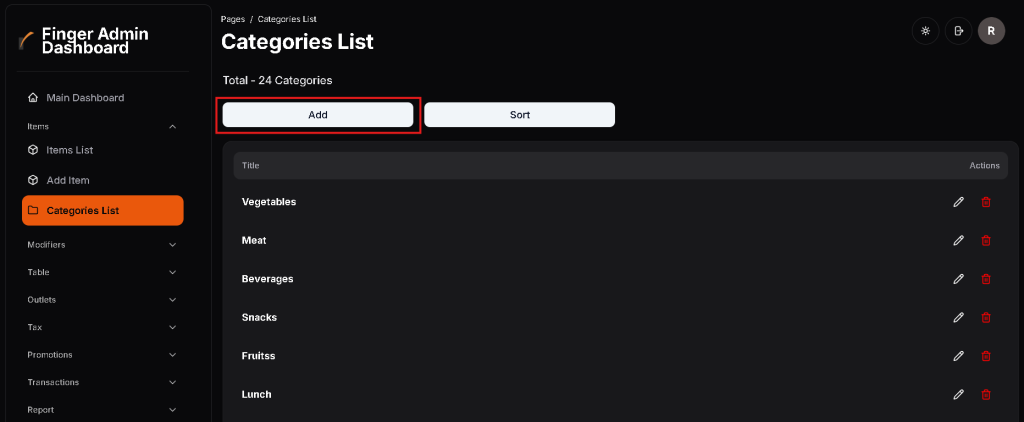
- Click on Items > Categories List > Add.
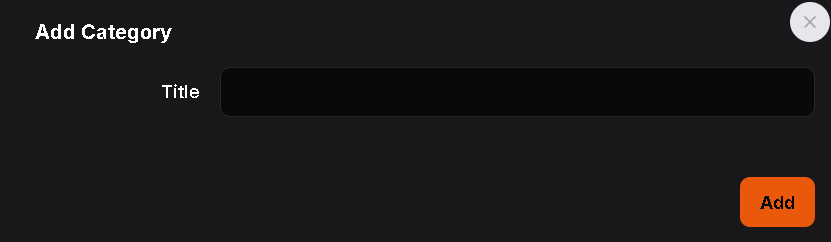
- Enter Title (Name for category) > click Add.
How to edit categories
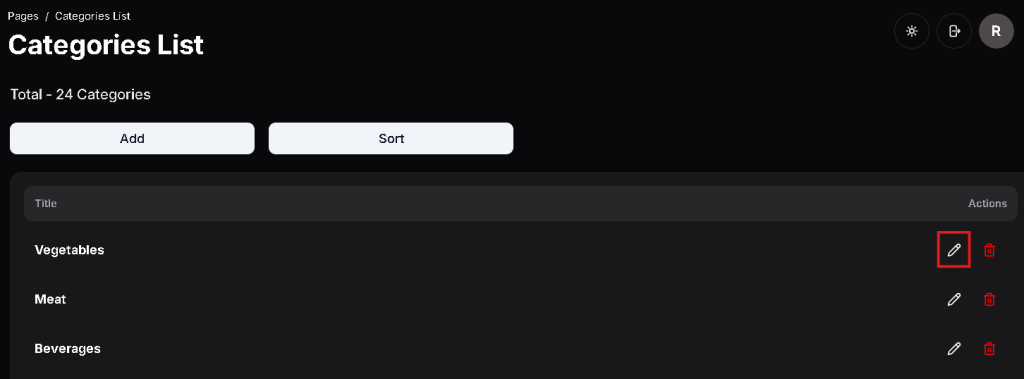
- Click on Items > Categories List (find the category that you want to edit) > Actions > Edit (Icon shown in the picture above).
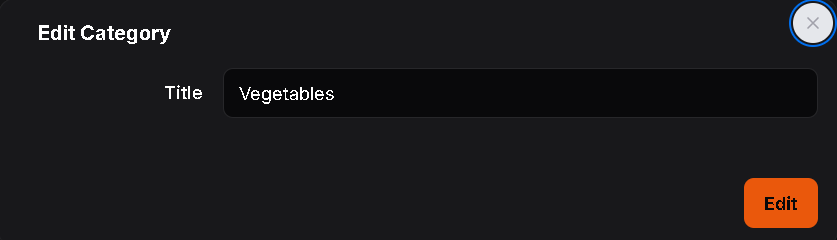
- Users will be taken to the Edit Category page.
How to delete categories
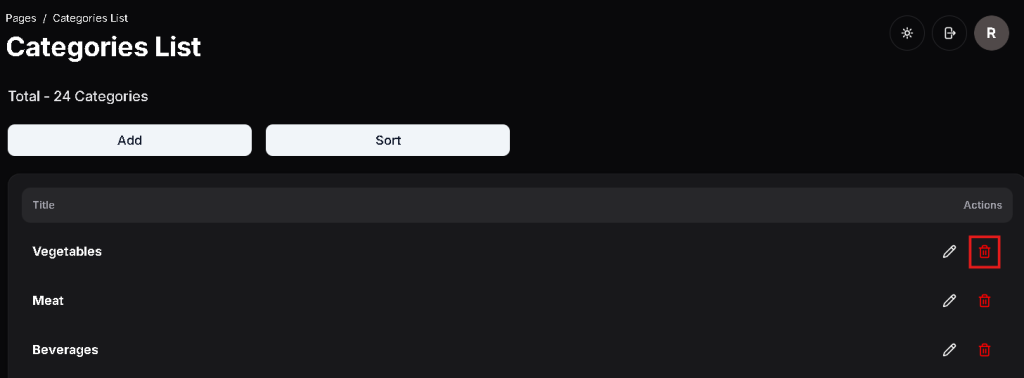
- Click on Items > Categories List (find the category that you want to delete) > Actions > Delete (Icon shown in the picture above).
How to sort categories
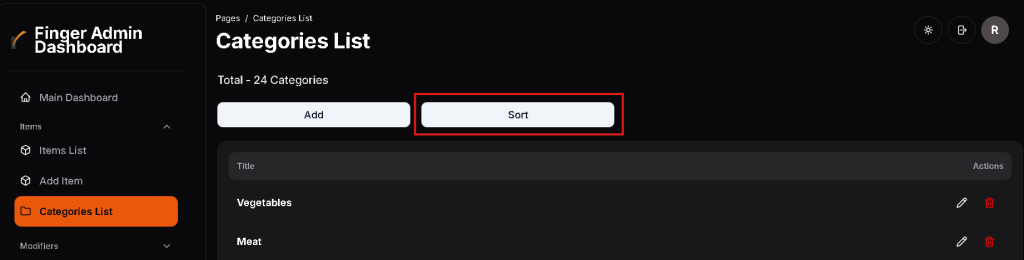
- Click on Items > Categories List > Sort.

- Items can be sorted by dragging them around.
FAQ 2.0 Set up Modifiers
How to add modifiers
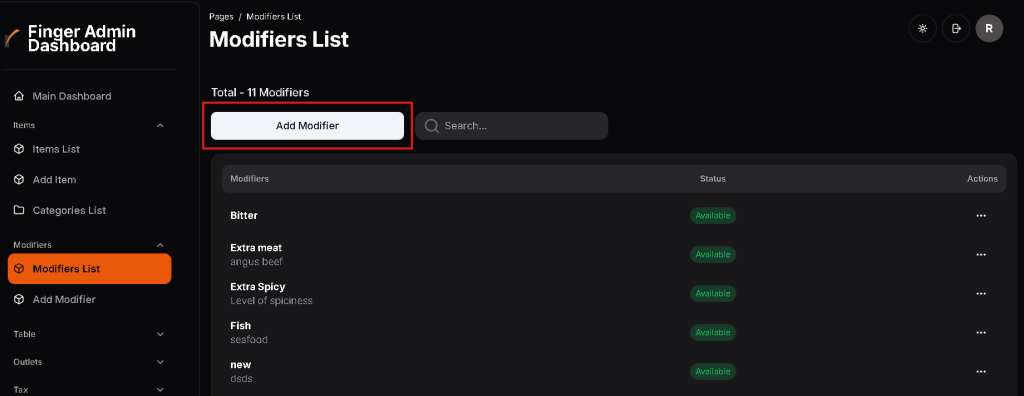
- Click on Modifiers > Modifiers List > Add Modifiers.
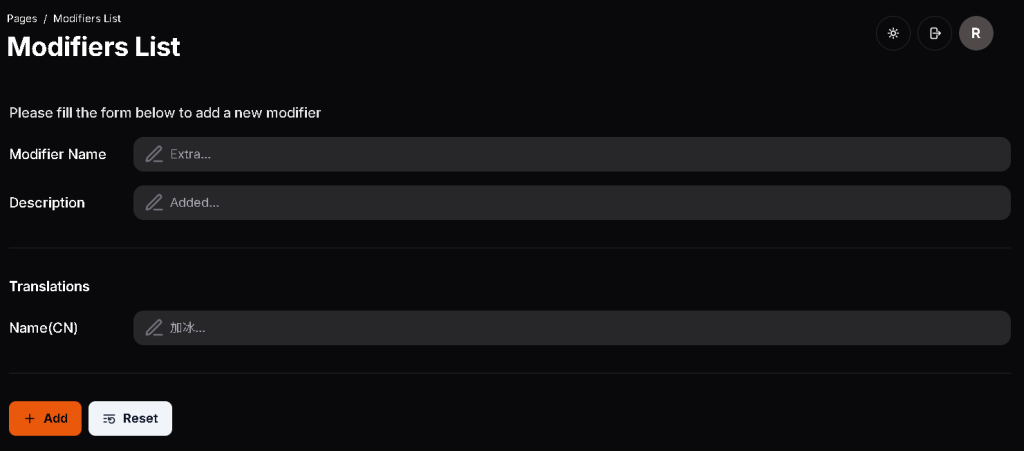
- Enter Modifier Name (Eg. More Sugar)
- Enter Description [Optional]
- Enter Translation for modifier name [Optional]
- Click Add.
How to edit modifiers

- Click on Modifiers > Modifiers List (find the modifier that you want to edit) > Actions > Edit (Icon shown in the picture above).
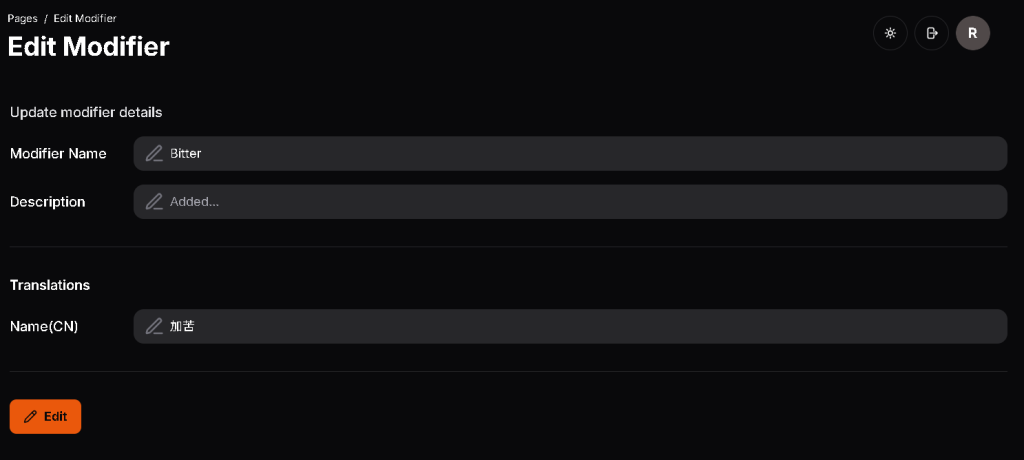
- Users will be taken to the Edit Modifier page.
How to delete modifiers
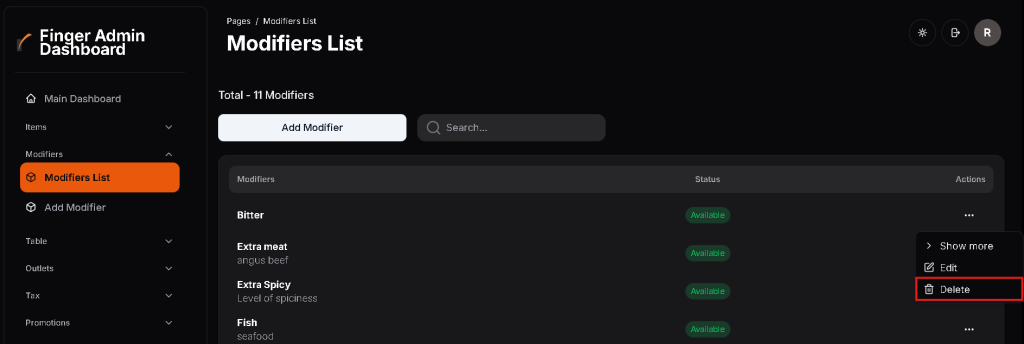
- Click on Modifiers > Modifiers List (find the modifier that you want to delete) > Actions > Delete (Icon shown in the picture above).
FAQ 3.0 Set up Tables
How to add tables
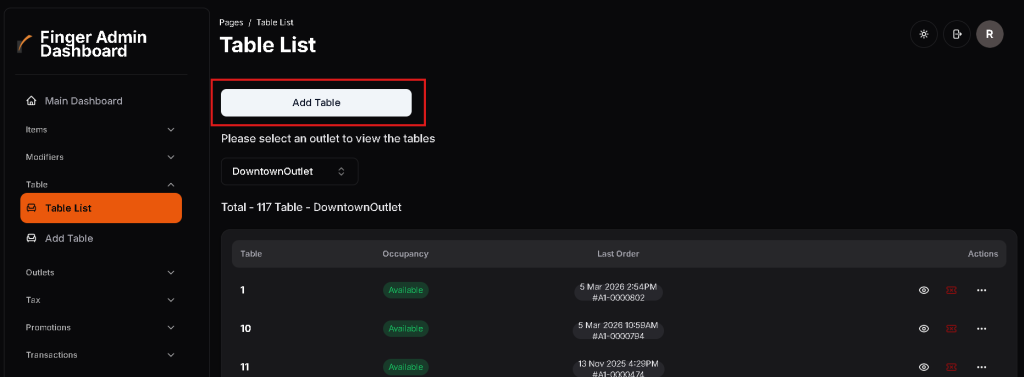
- Click on Table > Table List > Add Table.
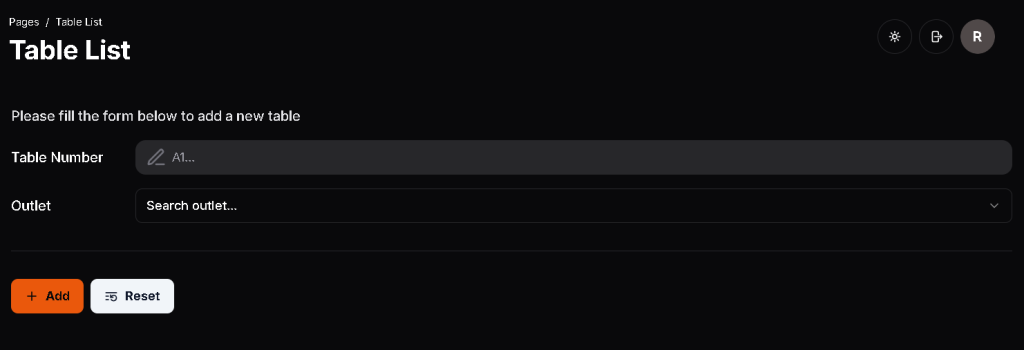
- Enter Table Number (Eg. A1)
- Select an Outlet (Table will be added on the selected outlet)
- Click Add
How to edit tables
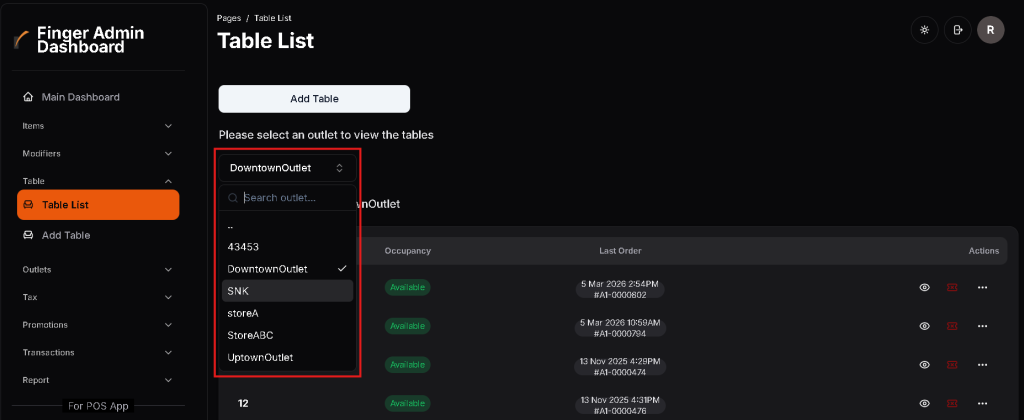
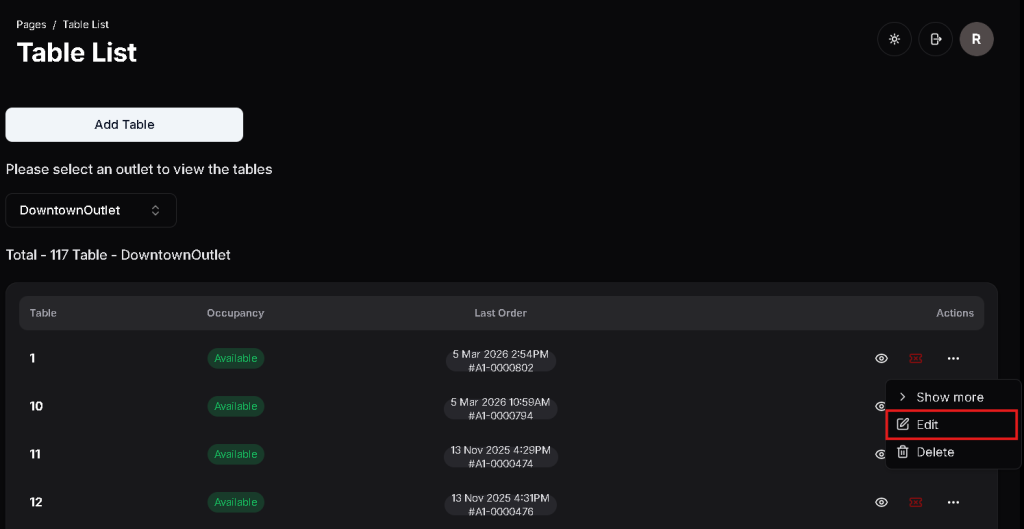
- Click on Table > Table List > (Select an outlet) > (Find the table that you want to edit) > Actions > Edit (Icon shown in the picture above).
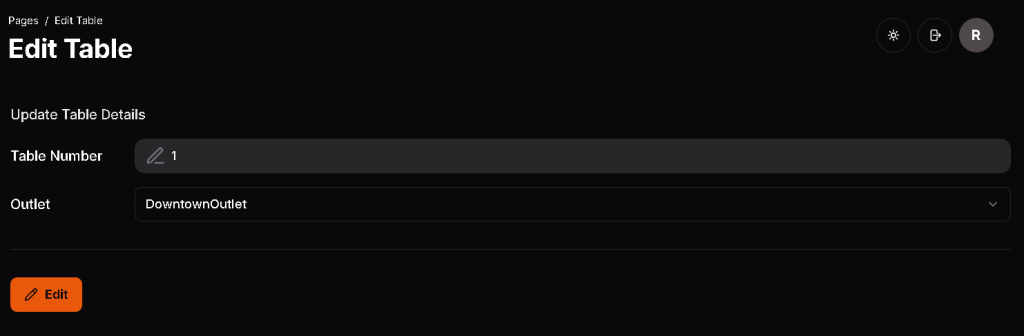
- Users will be taken to the Edit Table page.
How to delete tables

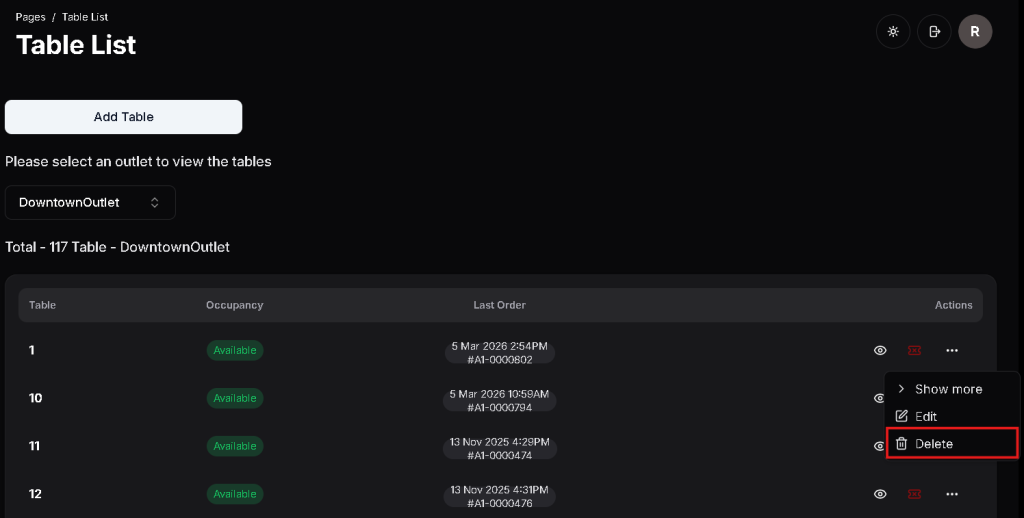
- Click on Table > Table List > (Select an outlet) > (Find the table that you want to delete) > Actions > Delete (Icon shown in the picture above).
How to hide/close tables

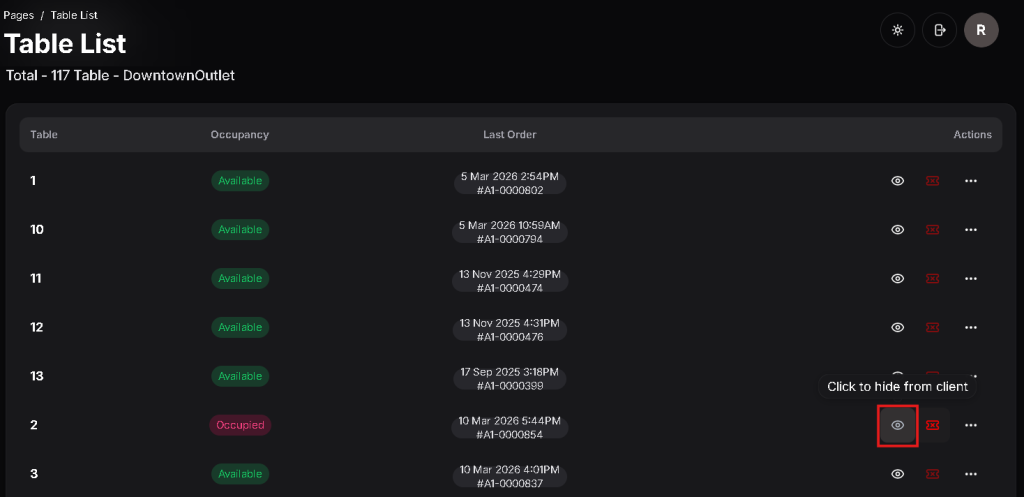
- Hide Tables
- Click on Table > Table List > (Select an outlet) > (Find the table that you want to hide) > Hide (Icon shown in the picture above).
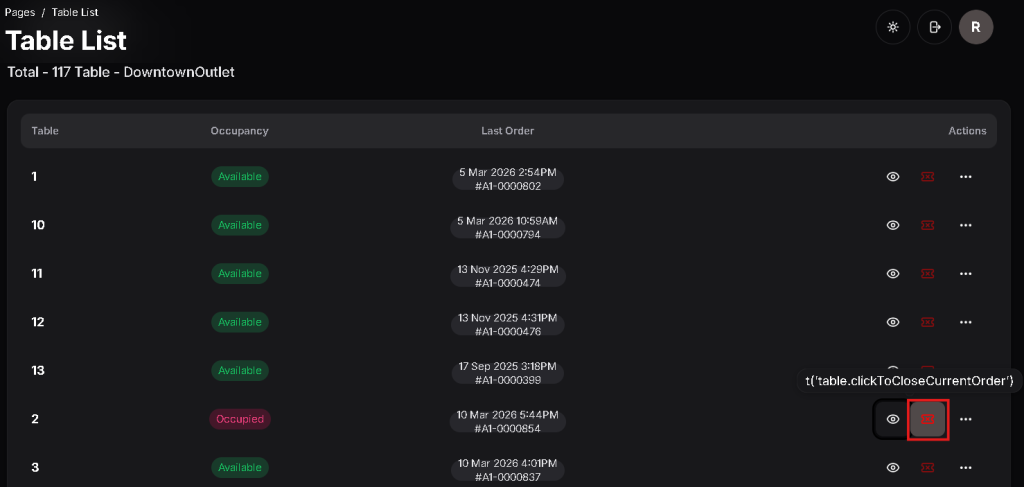
- Close Tables
- Click on Table > Table List > (Select an outlet) > (Find the table that you want to close) > Close (Icon shown in the picture above).
FAQ 4.0 Set up Outlets
How to add outlets
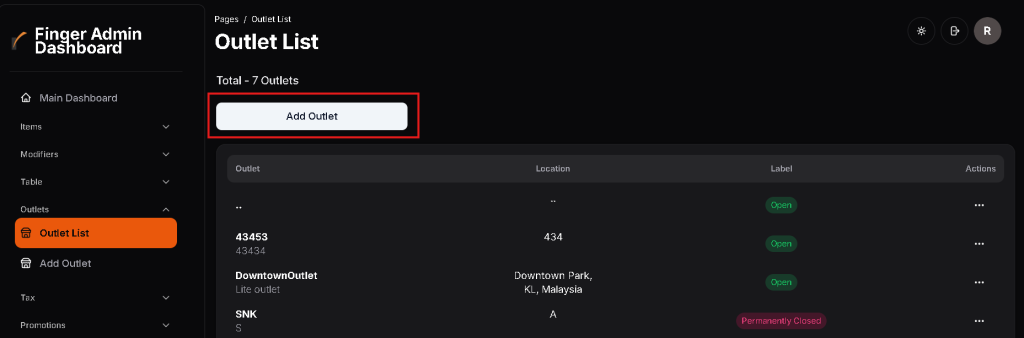
- Click on Outlets > Outlet List > Add Outlet.
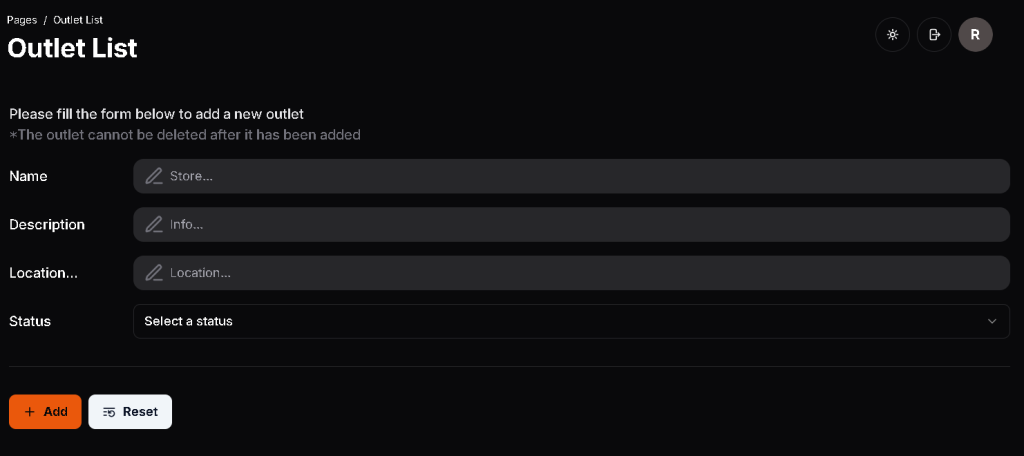
- Enter Outlet Name (Eg. McDonalds)
- Enter Description [Optional]
- Enter Location [Optional]
- Select Status for outlet (Open/ Maintaining/ Permanently closed)
How to edit outlets
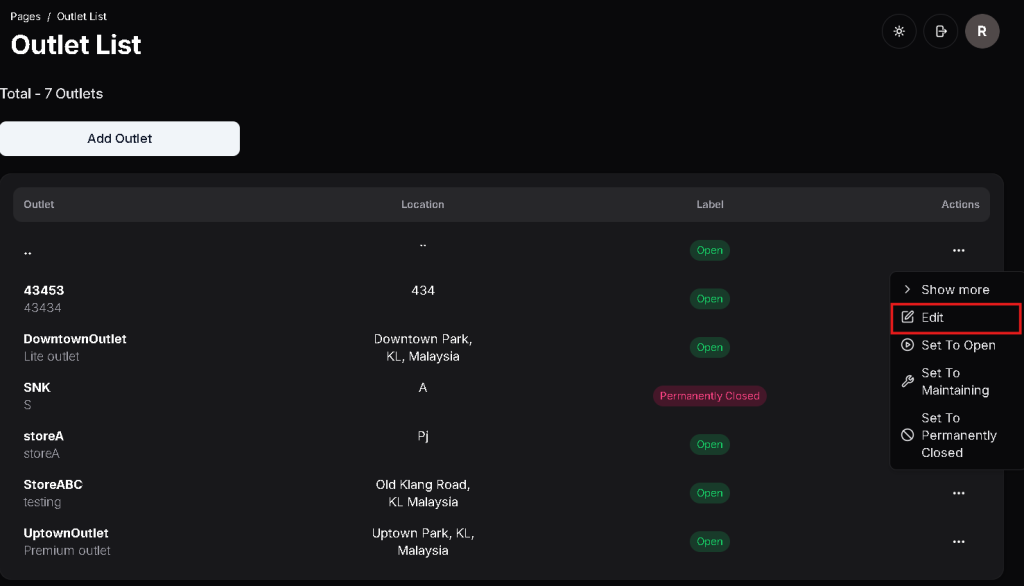
- Click on Outlets > Outlet List > (Find the outlet that you want to edit) > Actions > Edit (Icon shown in the picture above).
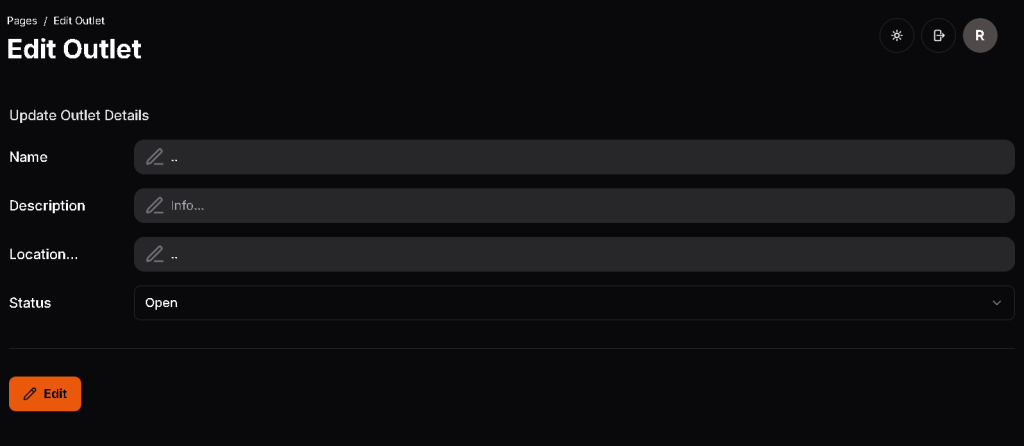
- Users will be taken to the Edit Outlet page.
- Name, Description, Location, and Status of the outlet can be edited.
How to change outlet status
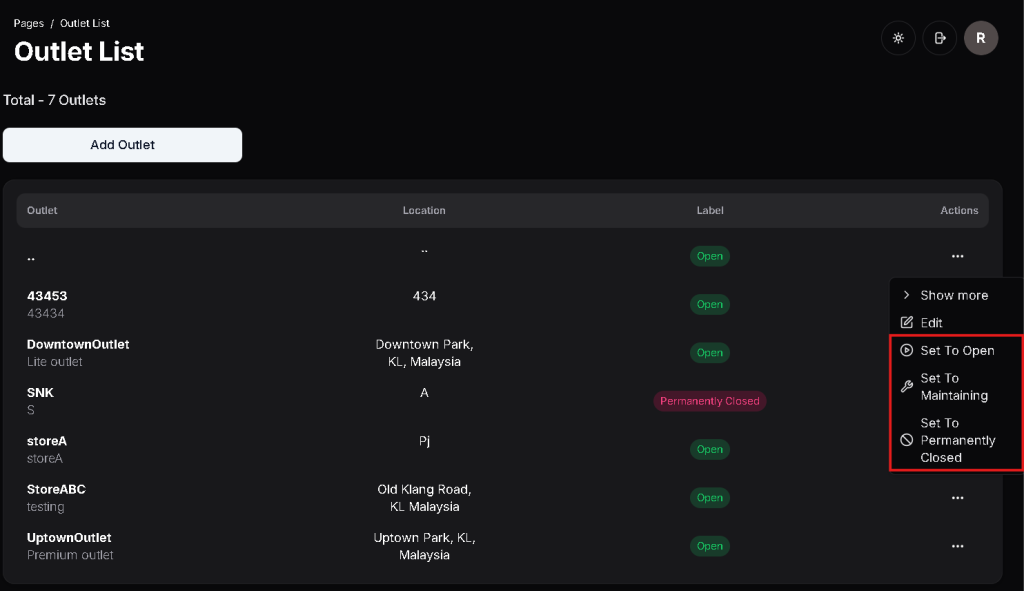
- Click on Outlets > Outlet List > (Find the outlet that you want the status to be changed) > Actions > Select (Set to Open/ Set to Maintaining/ Set to Permanently Closed) (Icons shown in the picture above).
FAQ 5.0 Set up Tax
How to add tax options
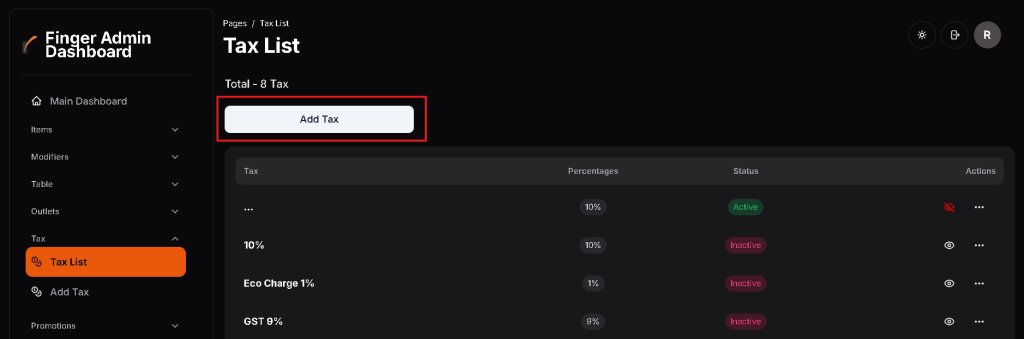
- Click on Tax > Tax List > Add Tax.
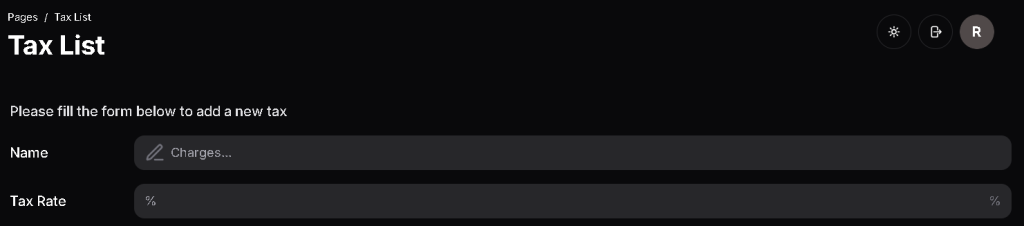
- Enter Tax Name (Eg. Service Charge)
- Enter Tax Rate (Eg. 10%)
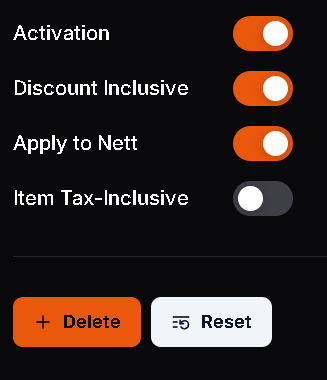
- Activation
- Tax will be active during sales, if activated.
- Discount Inclusive
- Tax will also be discounted if discount is applied in the bill, if activated.
- Apply to Nett
- The tax will be calculated only on the base price of the items. It ignores any other charges like service fees, if activated.
- Item Tax-Inclusive
- Tax will be included in all item pricing, if activated.
- Click Add
How to edit tax options
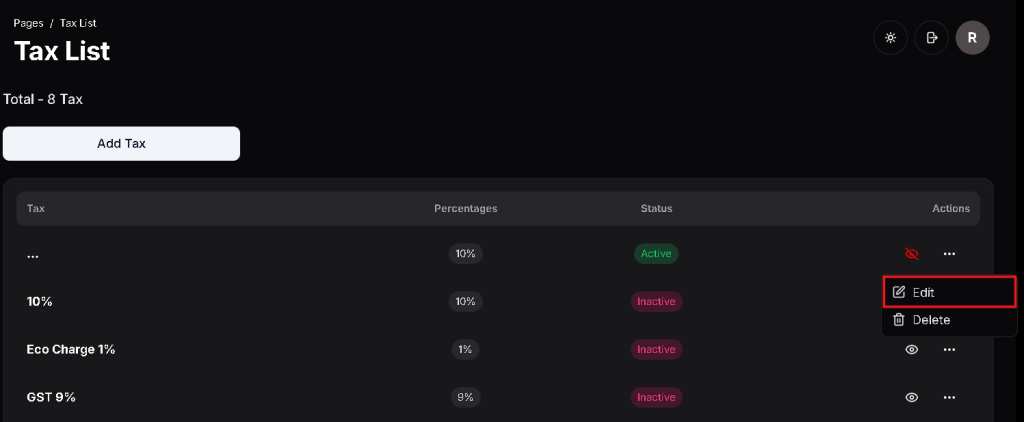
- Click on Tax > Tax List > (Find the tax that you want to edit) > Actions > Edit (Icon shown in the picture above).
- Users will be taken to the Edit Tax page.
How to delete tax options
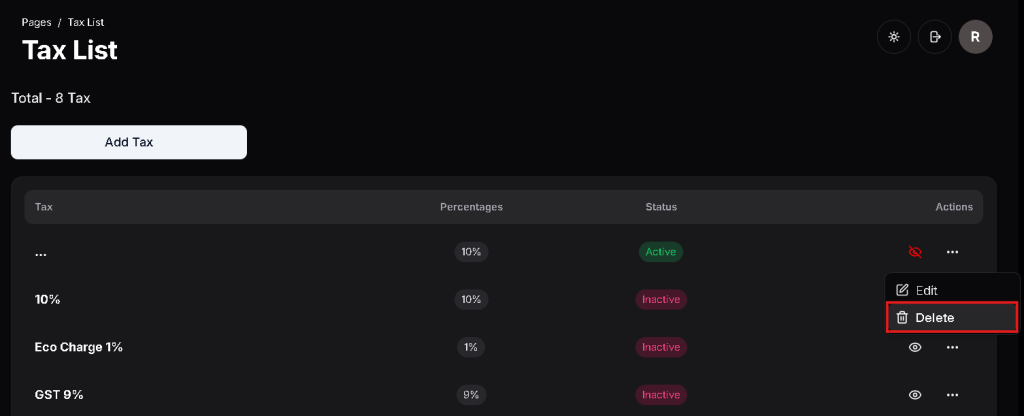
- Click on Tax > Tax List > (Find the tax that you want to delete) > Actions > Delete (Icon shown in the picture above).
How to deactivate taxes
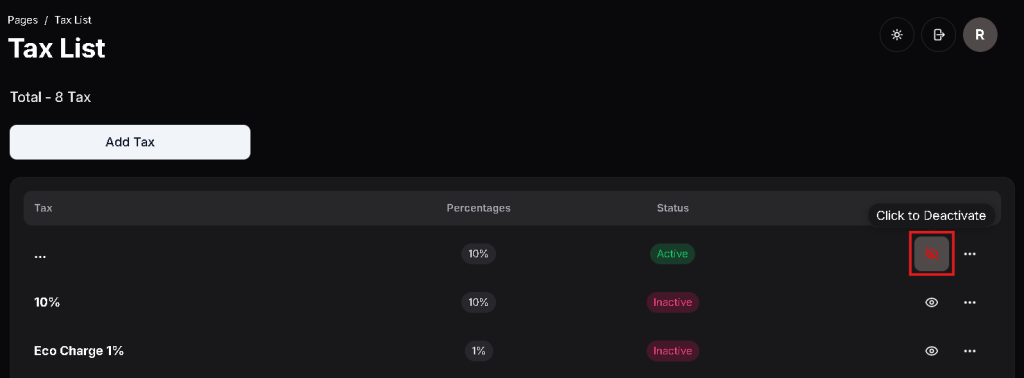
- Click on Tax > Tax List > (Find the tax that you want to deactivate) > Actions > Deactivate (Icon shown in the picture above), clicking the same button again will activate the tax.
FAQ 6.0 Set up Promotions
How to add promotion codes
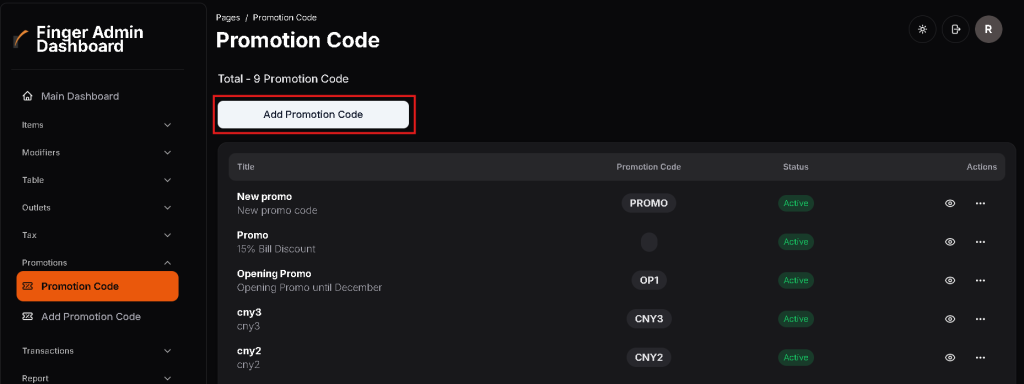
- Click on Promotions > Promotion Code > Add Promotion Code.
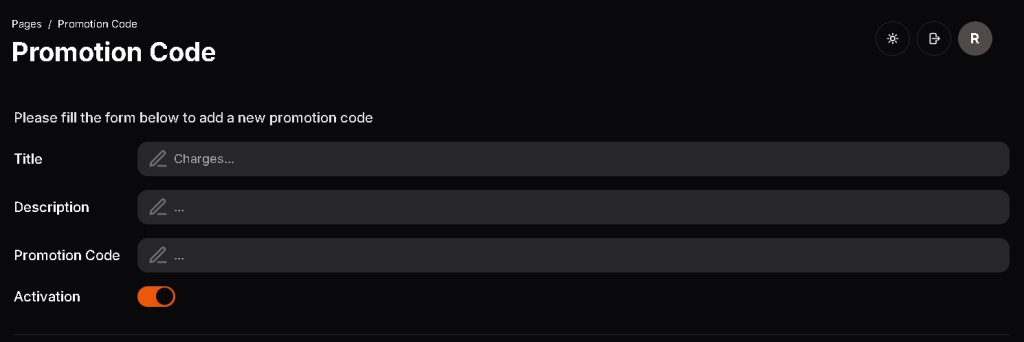
- Enter Promotion Title (Eg. CNY Promotion)
- Enter Description [Optional]
- Enter Promotion Code (Eg. CNY123)
- Activation: Promotion Code will be applicable, if activation is set to active.

- Select Promotion Type (Percentage/ Fixed Amount)
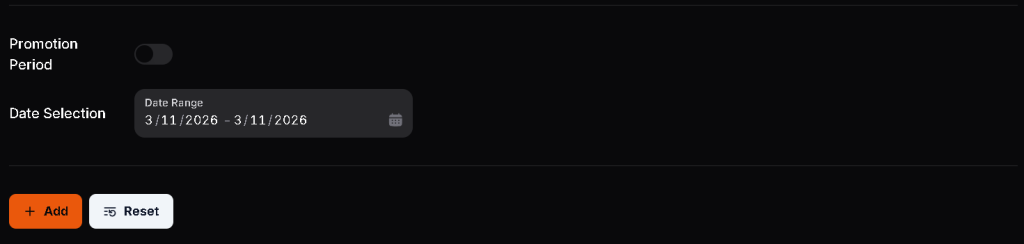
- Select a Date for Promotion Period.
- If Promotion Period is deactivated, promotion code will be permanently on.
- Click Add.
How to edit promotion codes

- Click on Promotions > Promotion Code > (Find the promotion code that you want to edit) > Actions > Edit (Icon shown in the picture above).
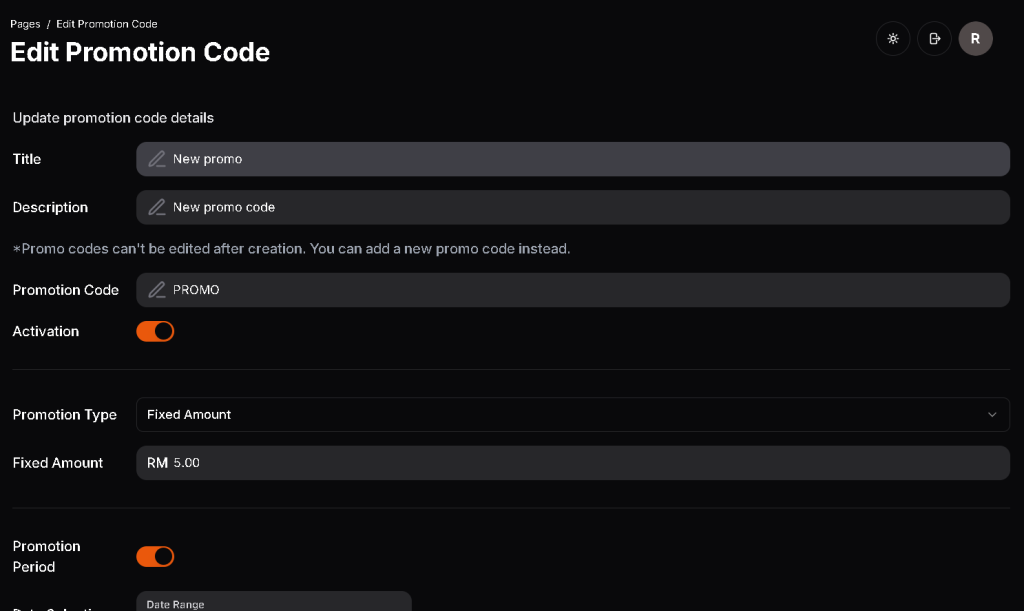
- Users will be taken to the Edit Promotion Code page.
How to delete promotion codes
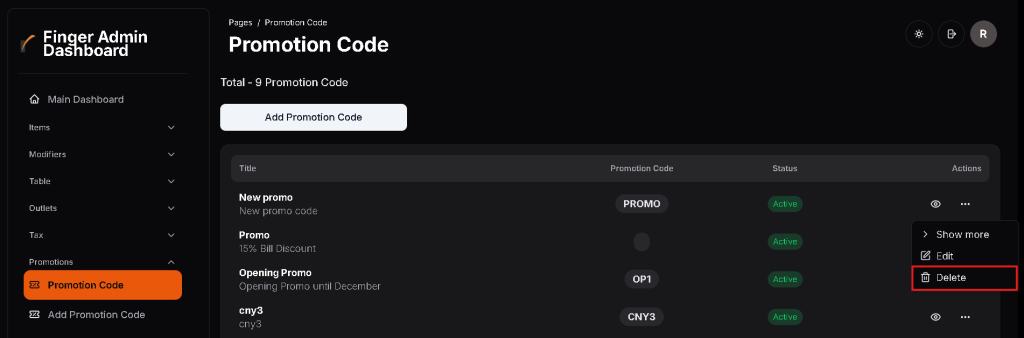
- Click on Promotions > Promotion Code > (Find the promotion code that you want to delete) > Actions > Delete (Icon shown in the picture above).
How to deactivate promotion codes
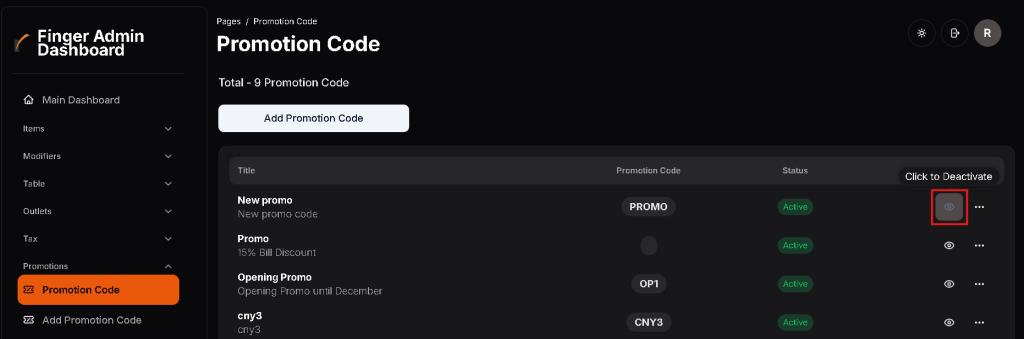
- Click on Promotions > Promotion Code > (Find the promotion code that you want to deactivate) > Actions > Deactivate (Icon shown in the picture above).
- Clicking the same button again will activate the promotion code.
FAQ 7.0 Transactions
How to view sales summary
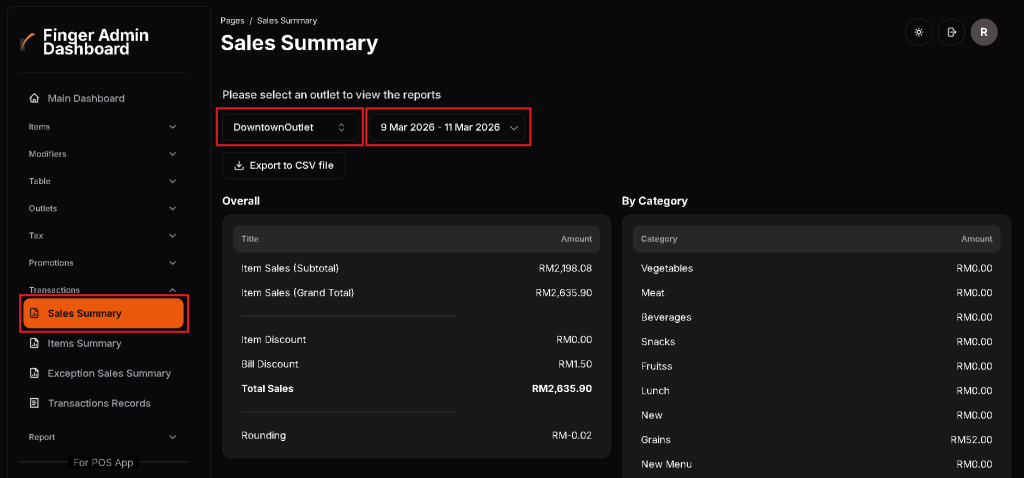
- Click on Transactions > Sales Summary > (Select an outlet) > (Select a date).
- Overall
- Displays overall sales.
- By Category
- Displays sales by category.
- By Payment
- Displays sales by payment.
- Conclusion
- Displays total sales.
How to view item sales summary
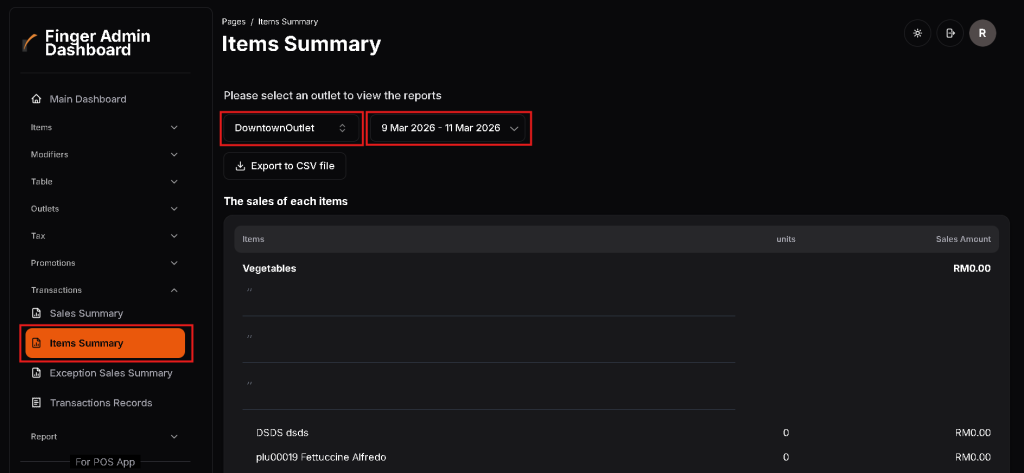
- Click on Transactions > Items Summary > (Select an outlet) > (Select a date).
- Displays the sales of each item.
How to view unpaid/ split/ voided/refunded transactions
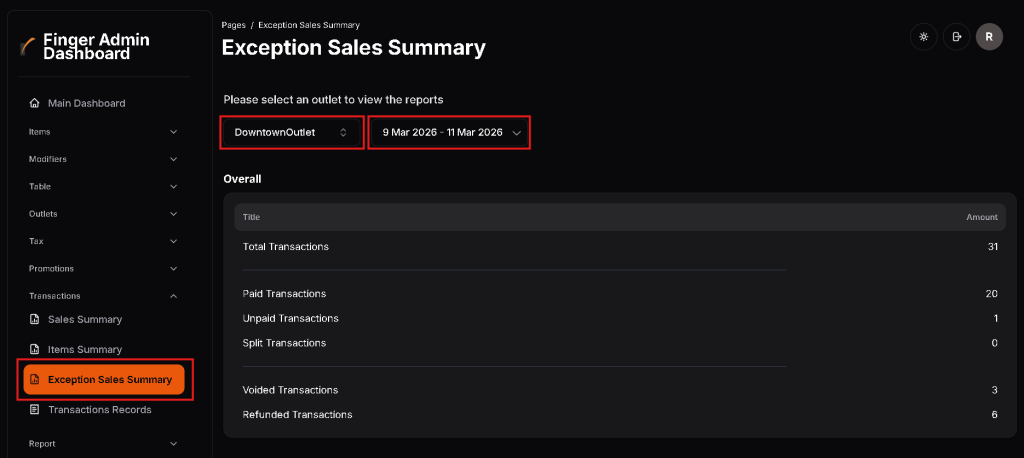
- Click on Transactions > Exception Sales Summary > (Select an outlet) > (Select a date).
- Displays the amount of all transactions made within the selected outlet and period.
How to view transactions records
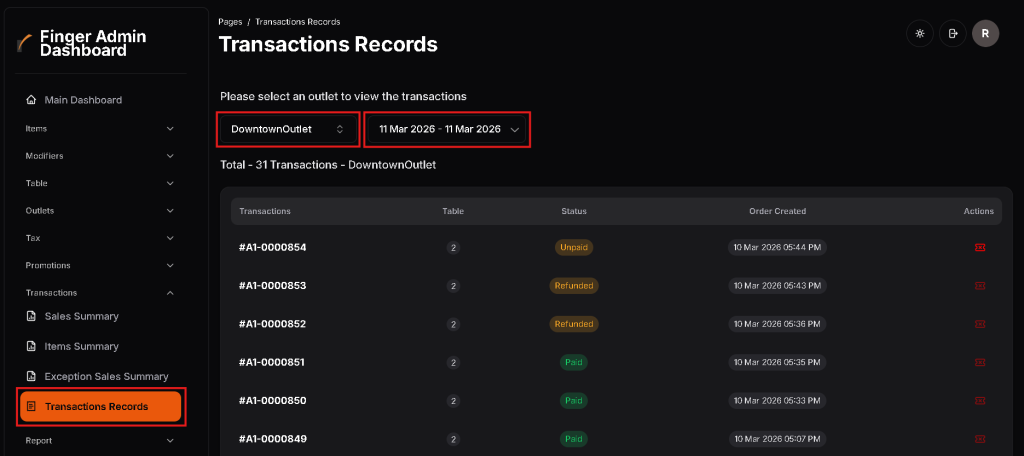
- Click on Transactions > Transactions Records > (Select an outlet) > (Select a date).
- Displays all transactions made within the selected outlet and period.
How to close unpaid transactions
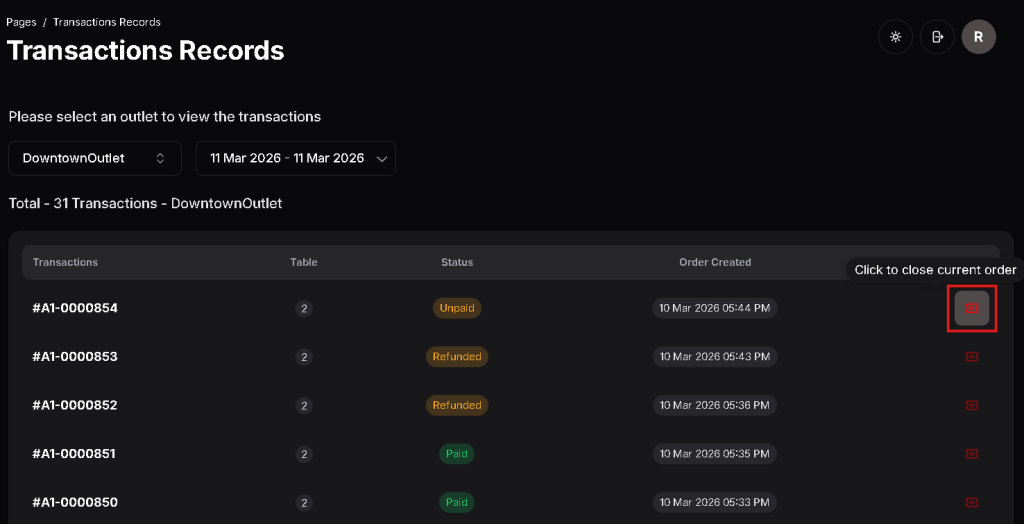
- Click on Transactions > Transactions Records > (Select an outlet) > (Select a date) > (Find the transaction you want to close) > Close Current Order (Icon shown in the picture above).
FAQ 8.0 Report
How to view daily sales
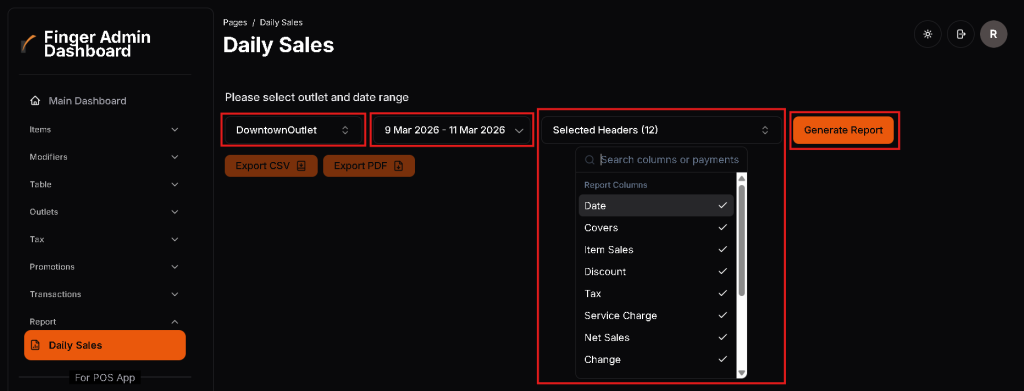
- Click on Report > Daily Sales > (Select an outlet) > (Select a date).
- Select Headers (Report Columns: Date, Covers, Item Sales, etc)/ (Payment Methods: Cash, TNG, Credit Card, etc).
- Click Generate Report.
- Daily Sales will be displayed.
FAQ 9.0 Set up POS IDs
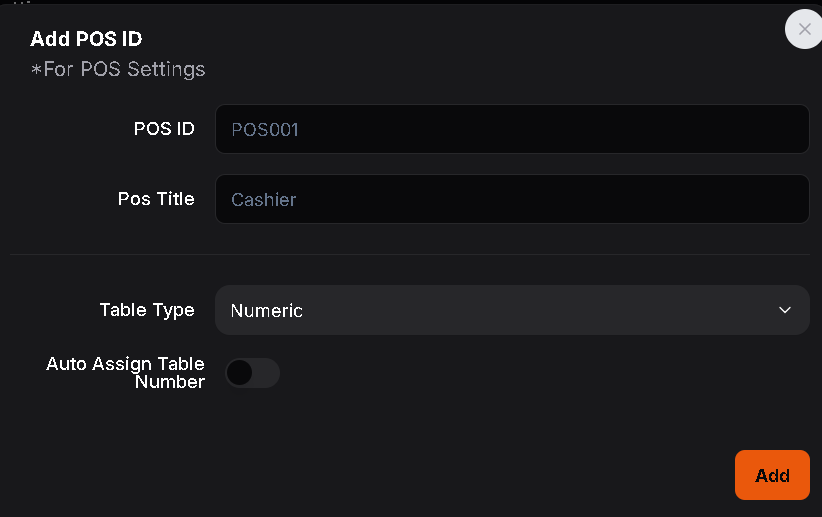
How to add POS ID
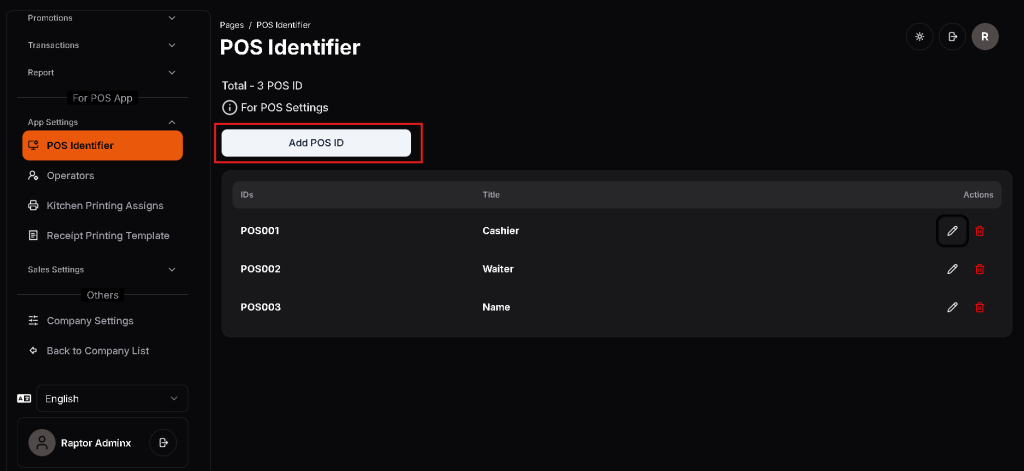
- Click on App Settings > POS Identifier > Add POS ID.
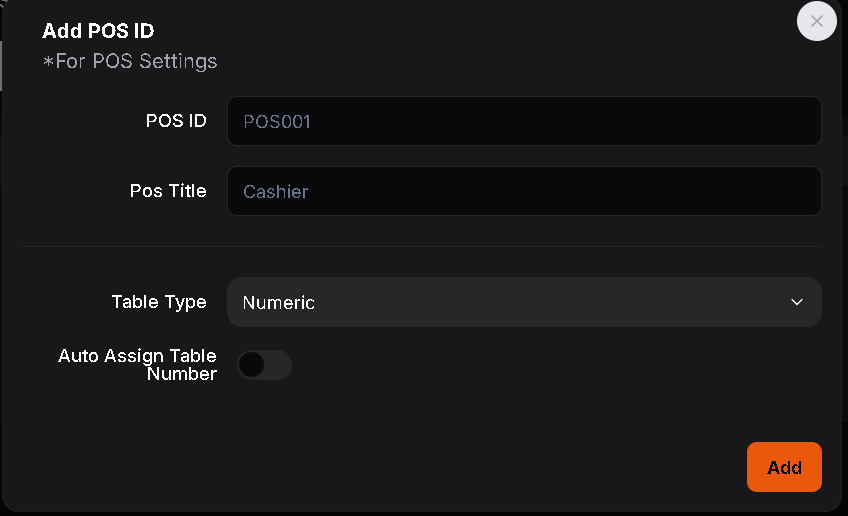
- Enter POS ID (Eg. POS001)
- Enter Pos Title (Eg. Cashier)
- Assign Table Type (Numeric/ AlphaNumeric)
- Auto Assign Table Number: Assigns a table automatically to the user of the POS ID, if activated.
How to edit POS ID
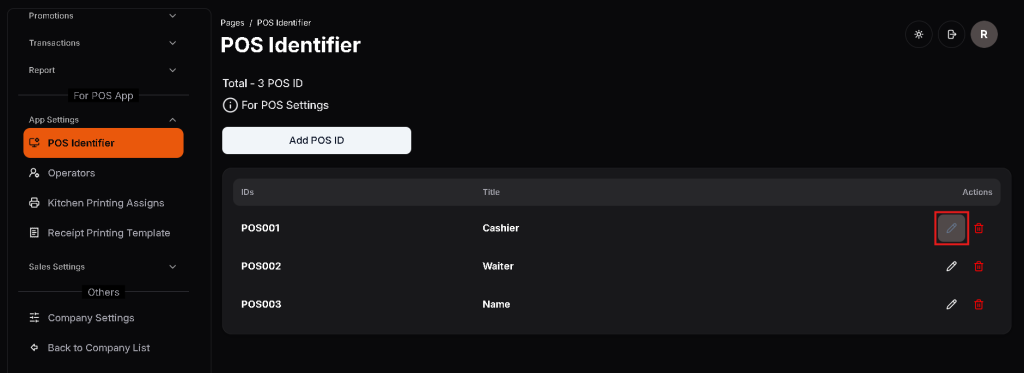
- Click on App Settings > POS Identifier > (Find the POS ID that you want to edit) > Actions > Edit (Icon shown in the picture above).

- Users will be taken to the Edit POS ID page.
How to delete POS ID

- Click on App Settings > POS Identifier > (Find the POS ID that you want to delete) > Actions > Delete (Icon shown in the picture above).
FAQ 10.0 Set up operators
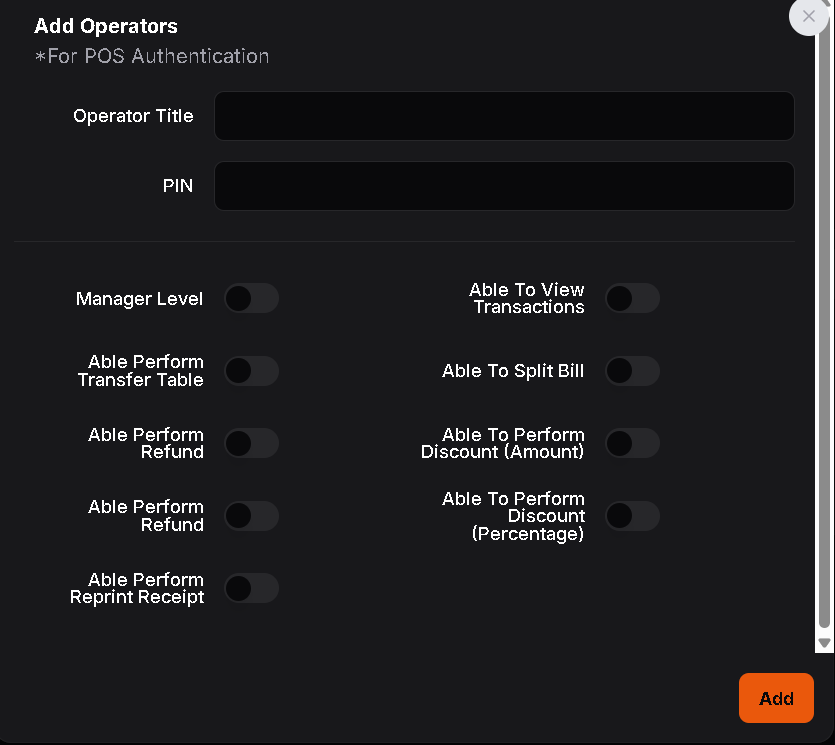
How to add operators

- Click on App Settings > Operators > Add Operator.
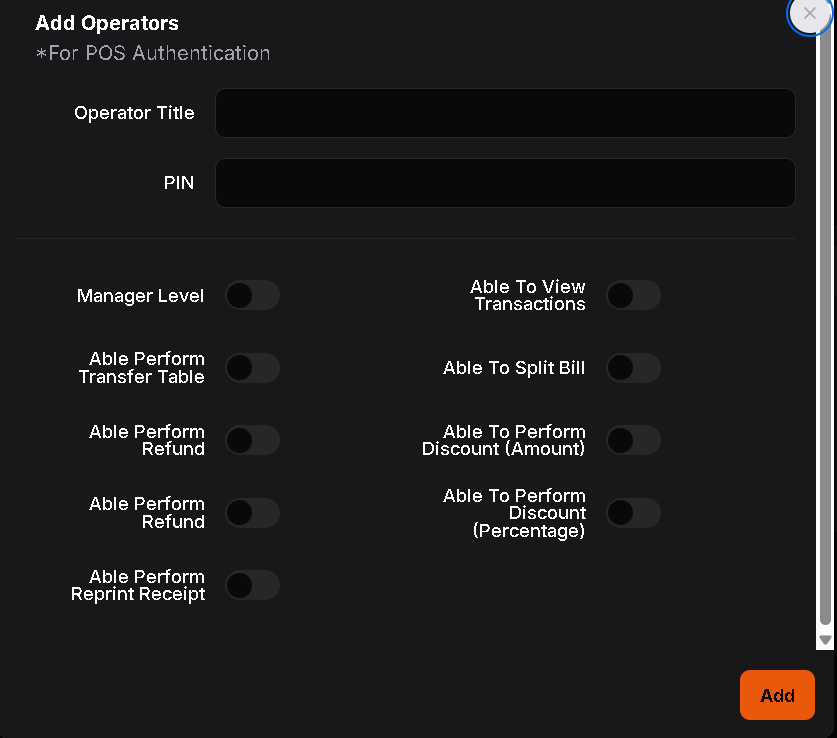
- Enter Operator Title (Eg. Manager)
- Enter PIN (Eg. 1234)
- Manager Level
- Operator will be set to manager level, if activated.
- Able to Perform Transfer Table
- Operator will be able to perform transfer table.
- Able to Perform Refund
- Operator will be able to refund transactions made.
- Able to Perform Reprint Receipt
- Operator will be able to reprint receipts of previous transactions.
- Able to View Transactions
- Operator will be able to view previous transactions made.
- Able to Split Bill
- Operator will be able to split unpaid bills.
- Able to Perform Discount (Amount)
- Operator will be able to apply discounts to items or bills in fixed amounts.
- Able to Perform Discount (Percentage)
- Operator will be able to apply discounts to items or bills in percentages.
How to edit operators
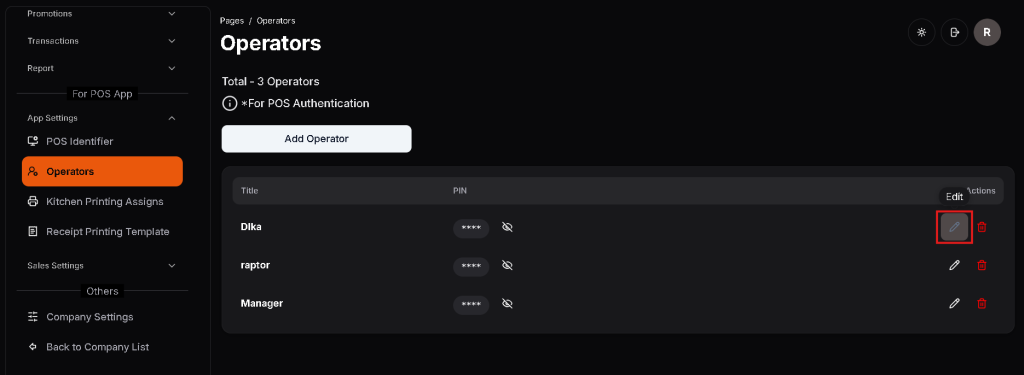
- Click on App Settings > Operators > (Find the operator that you want to edit) > Actions > Edit (Icon shown in the picture above).
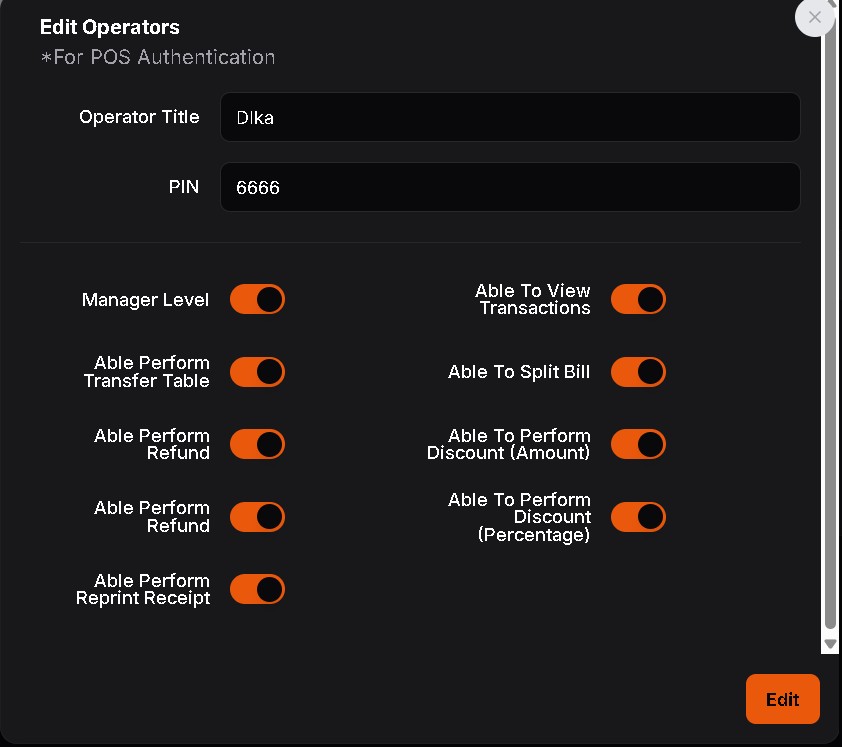
- Users will be taken to the Edit Operators page.
How to delete operators
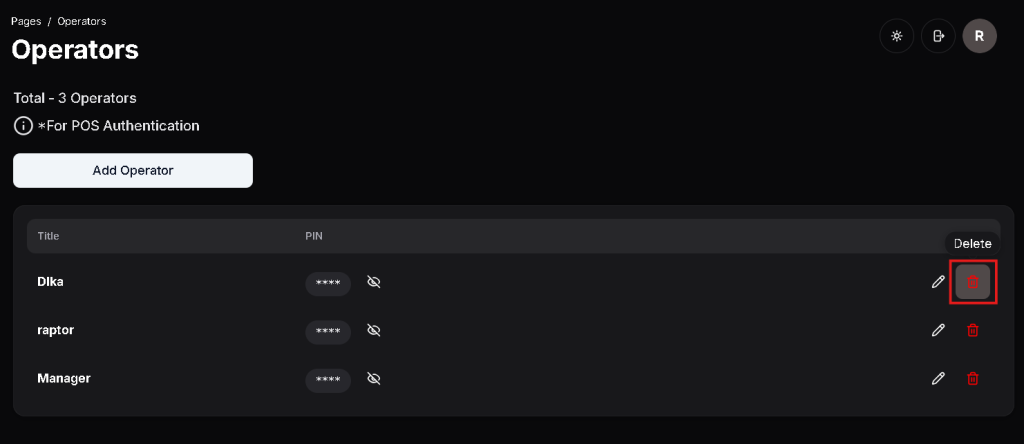
- Click on App Settings > Operators > (Find the operator that you want to delete) > Actions > Delete (Icon shown in the picture above).
How to view operator PIN
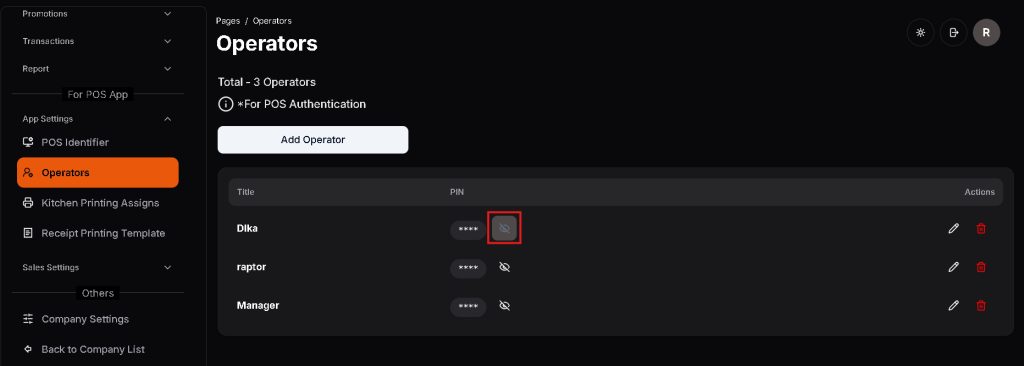
- Click on App Settings > Operators > (Find the operator that you want to view the PIN of) > View PIN (Icon shown in the picture above).
FAQ 11.0 Set up kitchen printing assignments
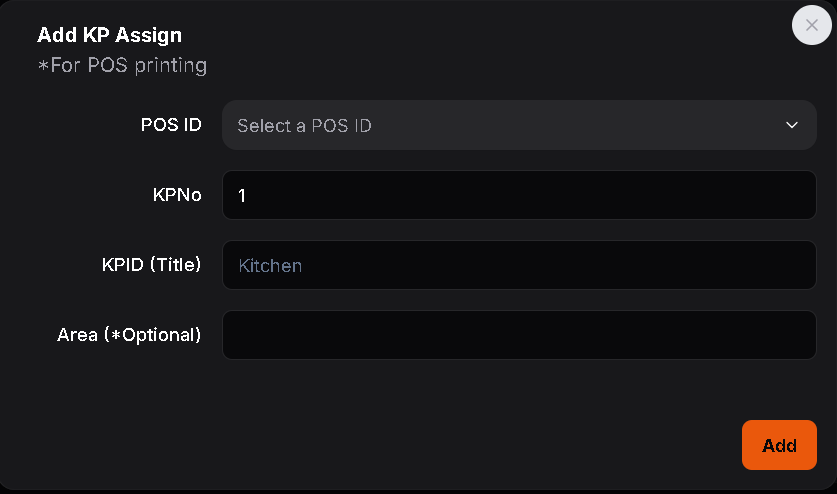
How to add kitchen printing assignments
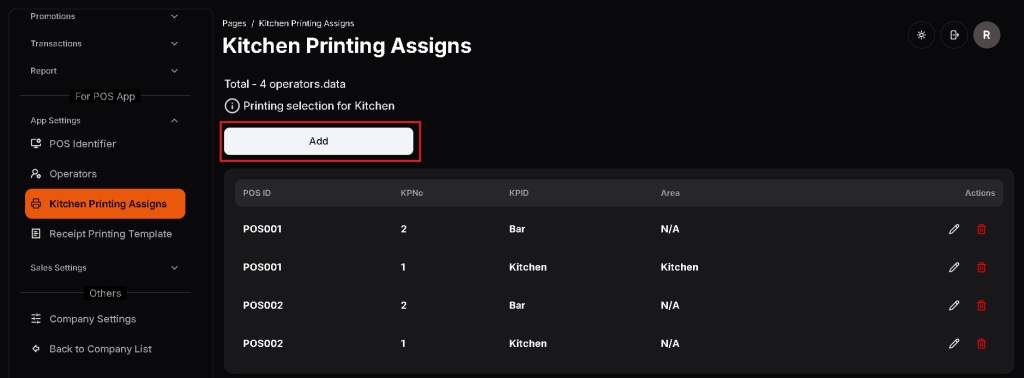
- Click on App Settings > Kitchen Printing Assigns > Add.
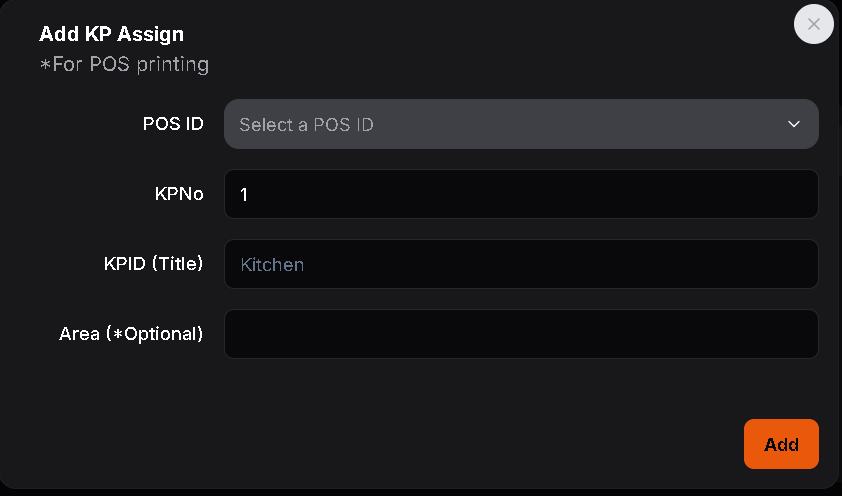
- Select POS ID
- Enter KPNo (Eg. KP1)
- Enter KPID (Eg. Kitchen)
- Enter Area [Optional]
How to edit kitchen printing assignments
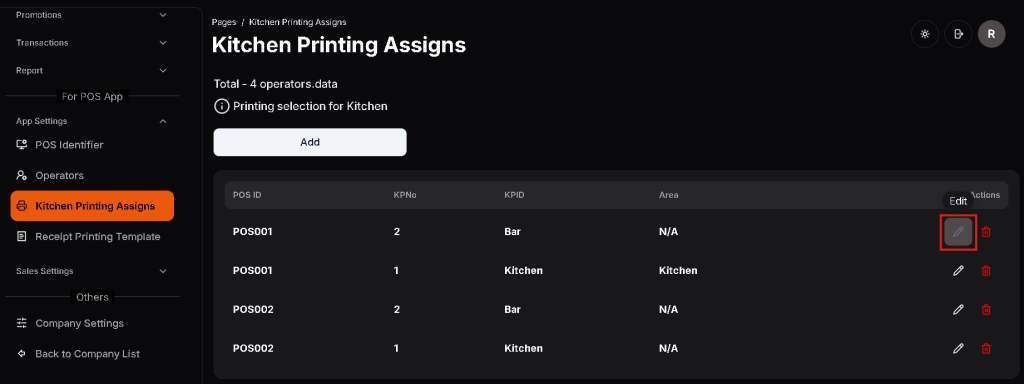
- Click on App Settings > Kitchen Printing Assigns > (Find the kitchen printing assignment that you want to edit) > Actions > Edit (Icon shown in the picture above).
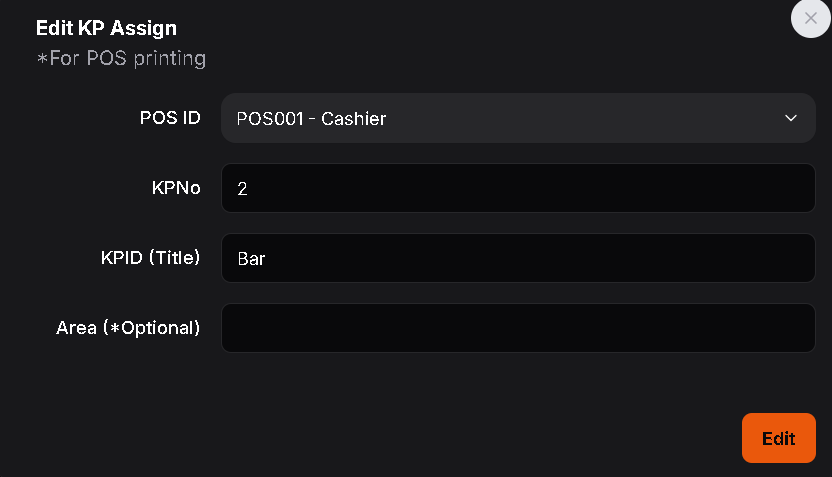
- Users will be taken to the Edit KP Assignment page.
How to delete kitchen printing assignments
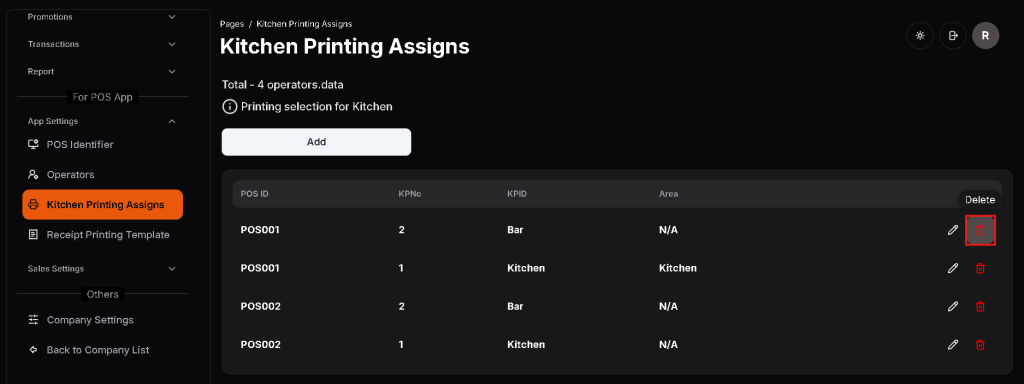
- Click on App Settings > Kitchen Printing Assigns > (Find the kitchen printing assignment that you want to delete) > Actions > Delete (Icon shown in the picture above).
FAQ 12.0 Set up receipt printing template
How to change receipt printing template
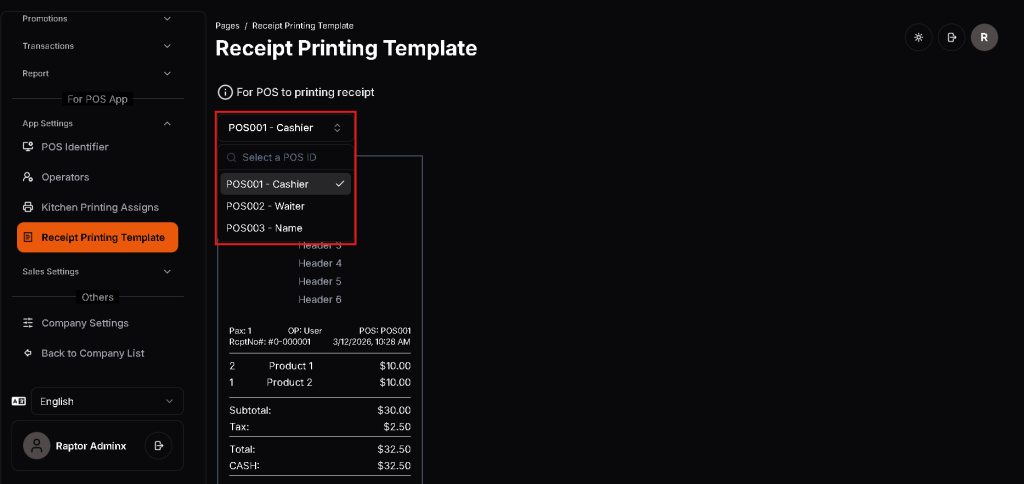
- Click on App Settings > Receipt Printing Template > (Find the POS ID that you want to edit) (Icon shown in the picture above).
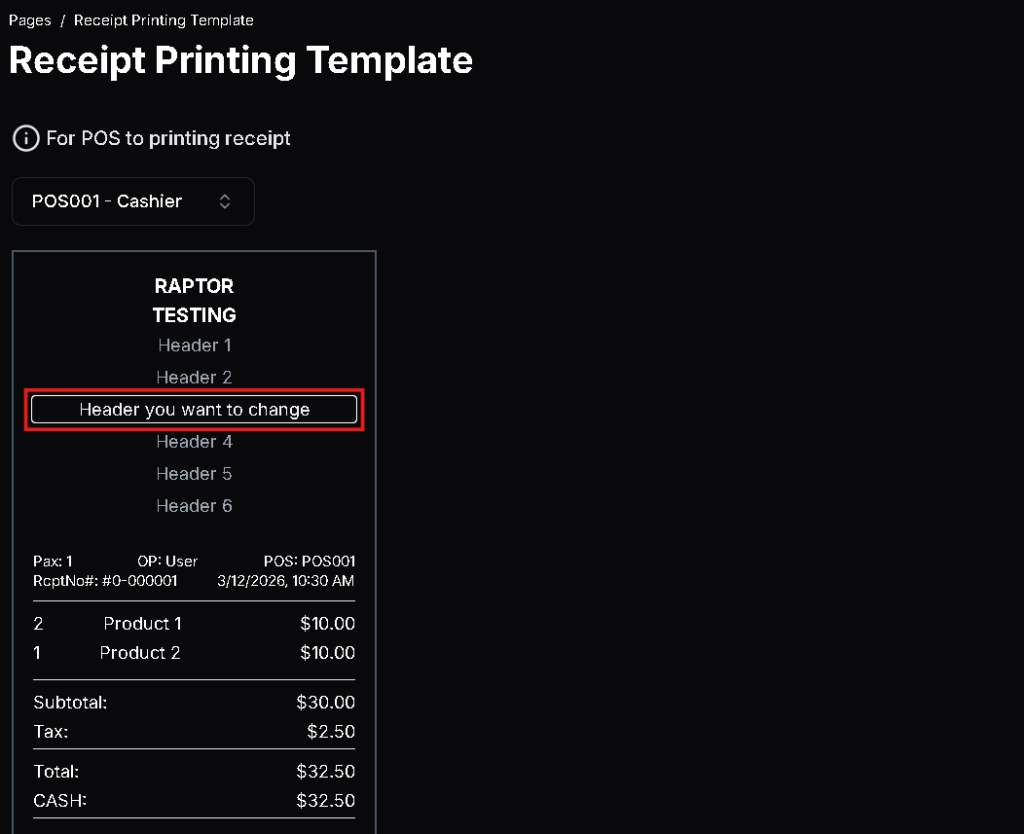
- Click the Header or Footer that you want to edit, and type what you want.
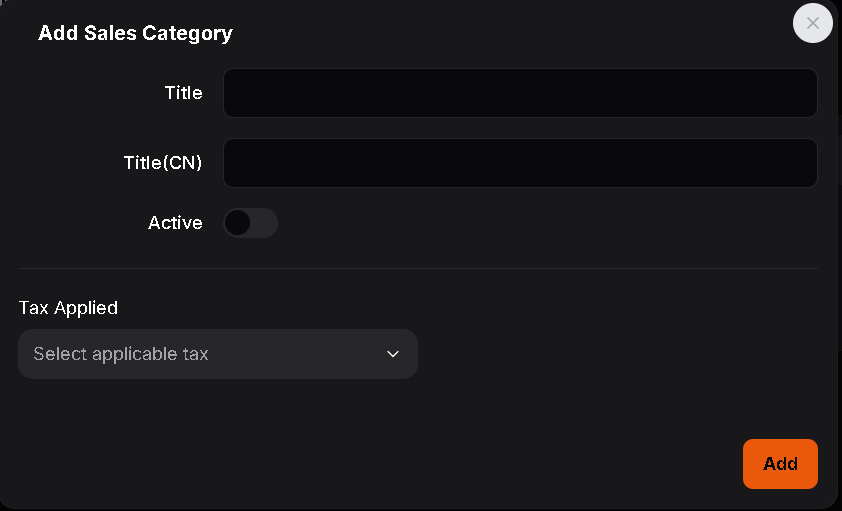
FAQ 13.0 Set up sales categories
How to add sales categories
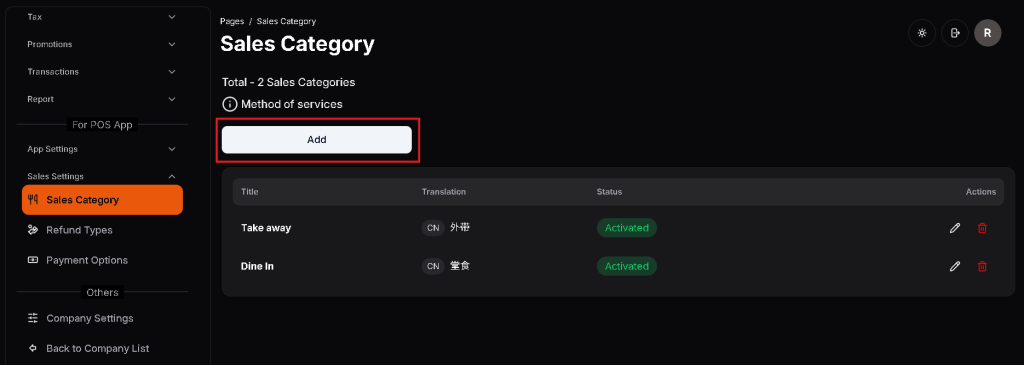
- Click on Sales Settings > Sales Category > Add.
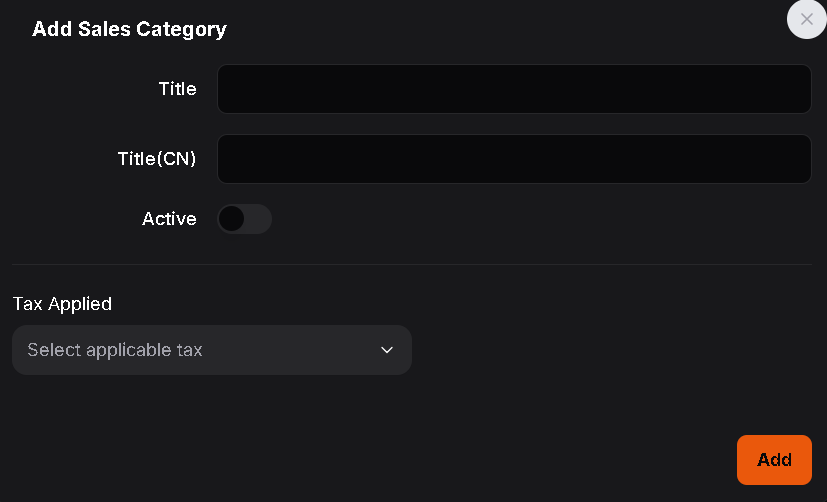
- Enter Title (Eg. Dine In)
- Enter Translation for title [Optional]
- Set Active/Inactive
- Select applicable Tax Options
- Click Add
How to edit sales categories
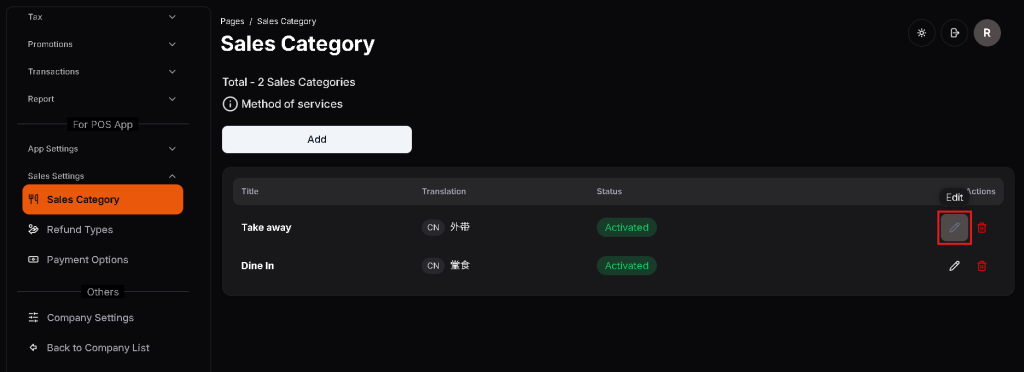
- Click on Sales Settings > Sales Category > (Find the sales category that you want to edit) > Actions > Edit (Icon shown in the picture above).
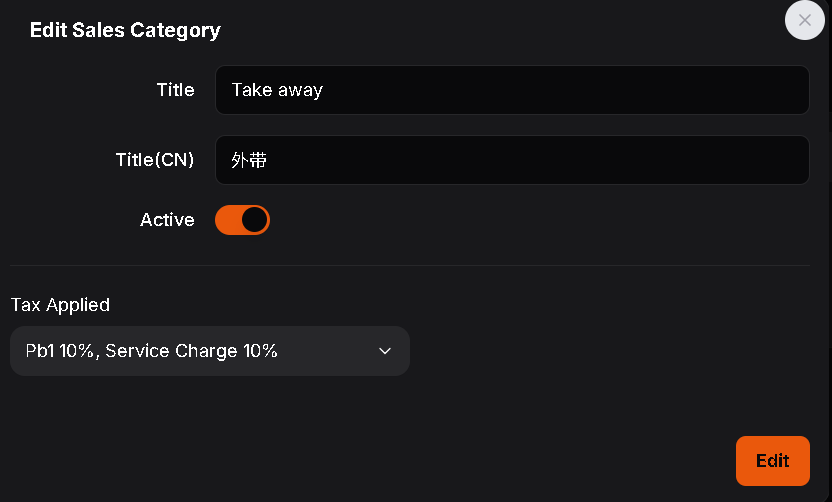
- Users will be taken to the Edit Sales Category page.
How to delete sales categories
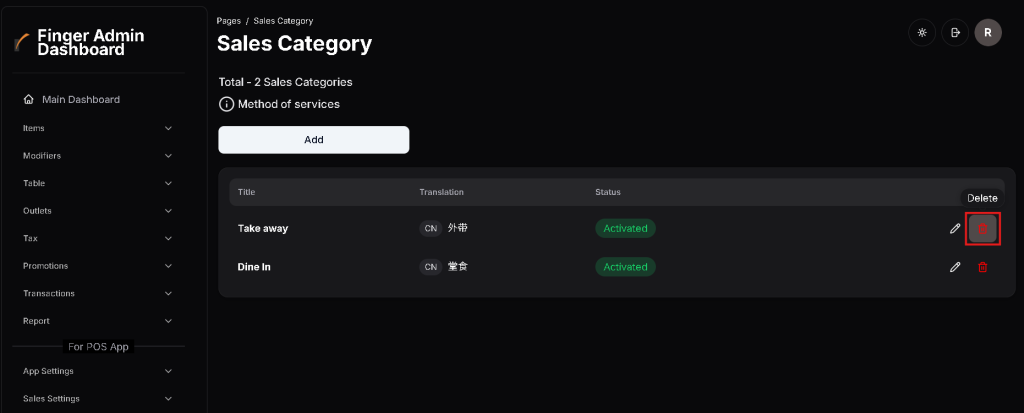
- Click on Sales Settings > Sales Category > (Find the sales category that you want to delete) > Actions > Delete (Icon shown in the picture above).
FAQ 14.0 Set up refund types
How to add refund types

- Click on Sales Settings > Refund Types > Add Remark.
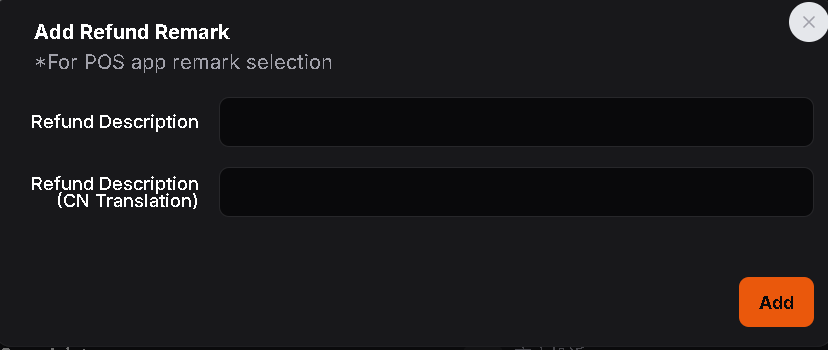
- Enter Refund Description (Eg. Staff Error)
- Enter Translation for refund description [Optional]
How to edit refund types
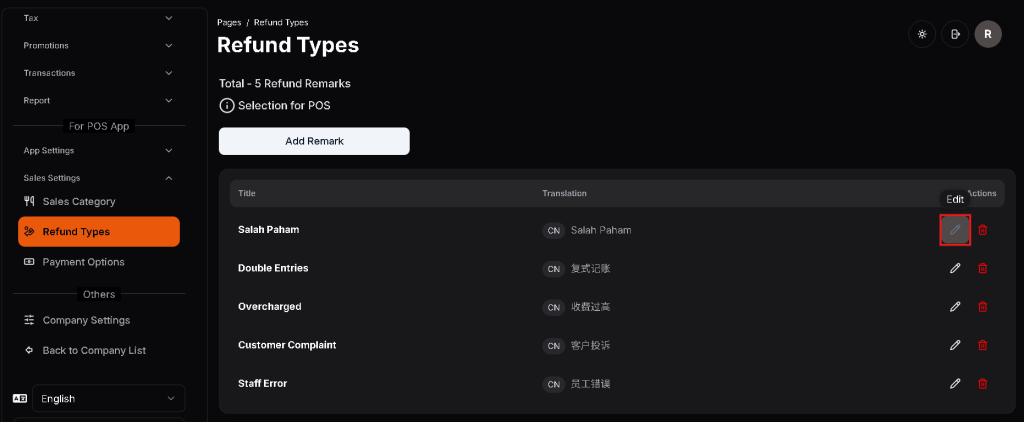
- Click on Sales Settings > Refund Types > (Find the refund title that you want to edit) > Actions > Edit (Icon shown in the picture above).

- Users will be taken to the Edit Refund Remark page.
How to delete refund types
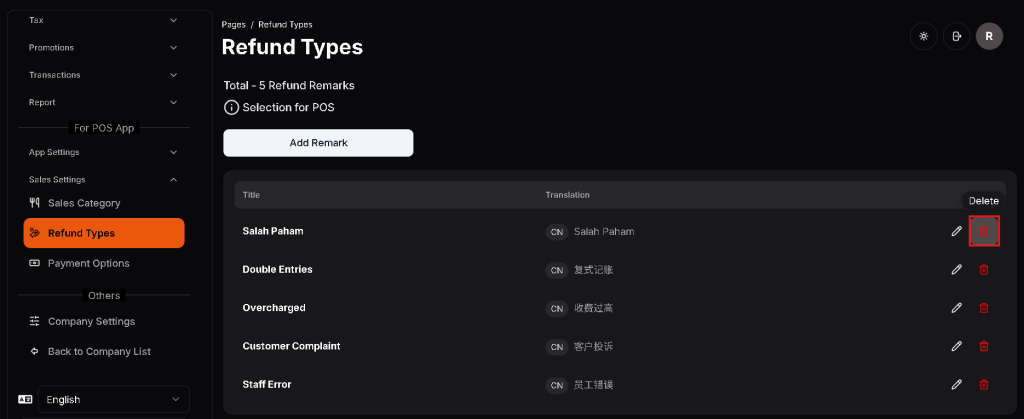
- Click on Sales Settings > Refund Types > (Find the refund title that you want to delete) > Actions > Delete (Icon shown in the picture above).
FAQ 15.0 Set up payment options
How to add payment options
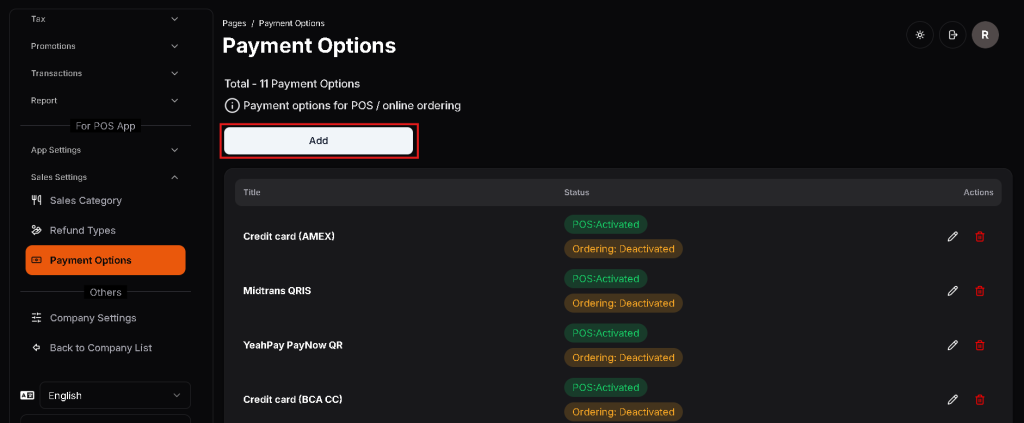
- Click on Sales Settings > Payment Options > Add.
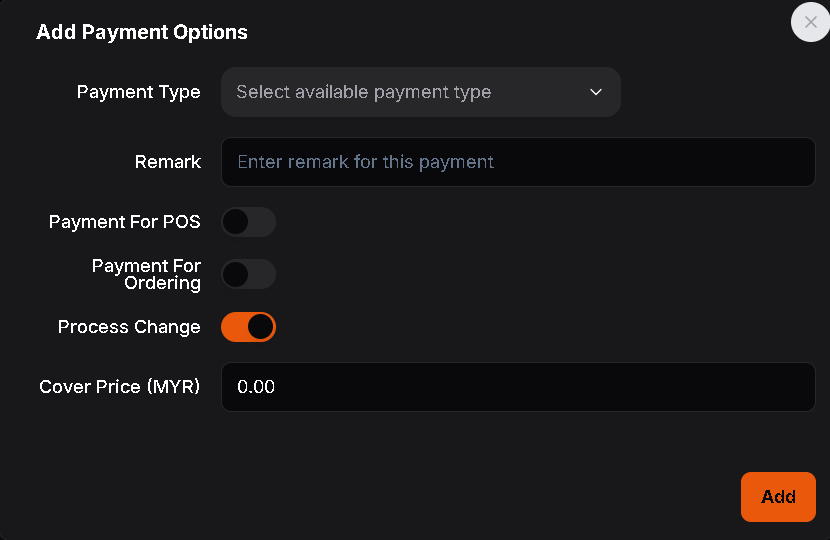
- Select a Payment Type (Eg. Cash, Credit Card, Vouchers, .etc)
- Enter a Remark [Optional]
- Payment for POS: enables the payment option for POS ordering, if activated.
- Payment for Ordering: enables the payment option for Online Ordering, if activated.
- Process Change: calculates the change for bills made with this payment option, if activated.
- Enter a Cover Price
How to edit payment options

- Click on Sales Settings > Payment Options > (Find the payment option that you want to edit) > Actions > Edit (Icon shown in the picture above).
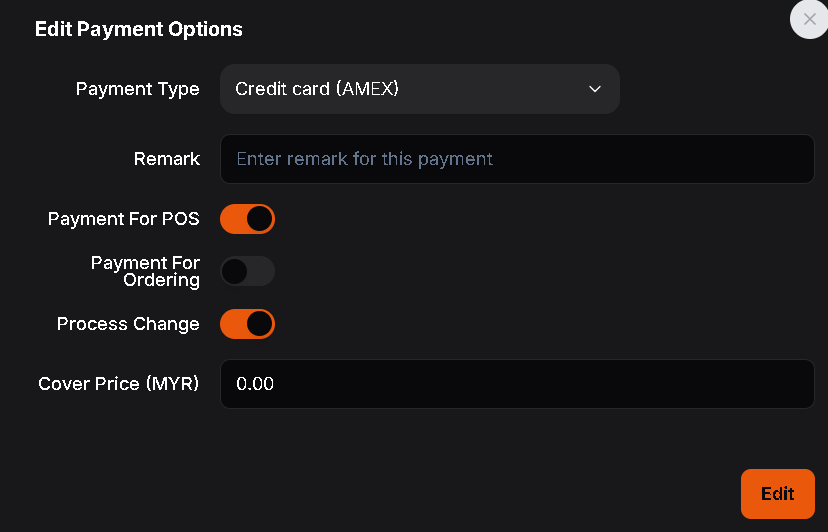
- Users will be taken to the Edit Payment Options page.
How to delete payment options
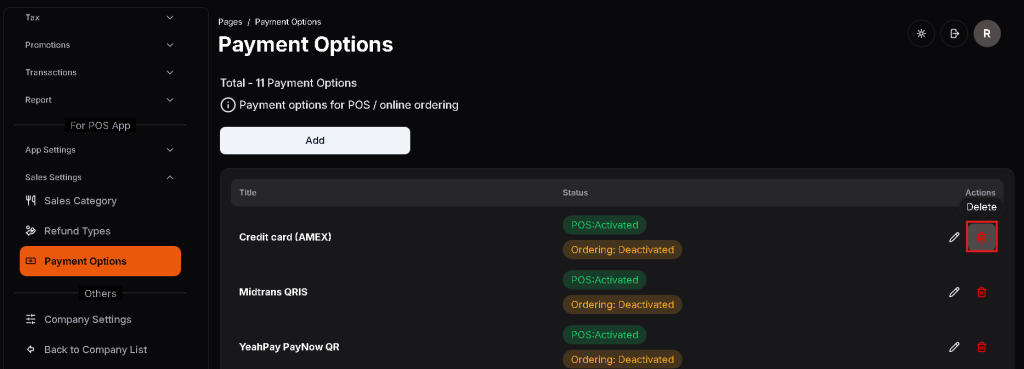
- Click on Sales Settings > Payment Options > (Find the payment option that you want to delete) > Actions > Delete (Icon shown in the picture above).
FAQ 16.0 Set up company settings
How to change company settings

- Click on Company Settings
- Company Title, Company Description, and Company Location, can be edited.
How to change currency settings
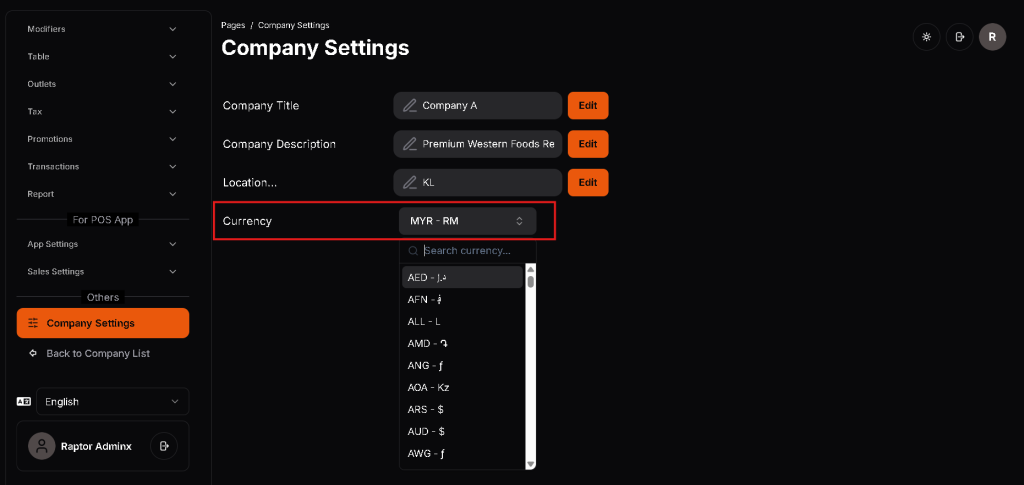
- Click on Company Settings > Currency (Icon shown in the picture above) > (Change to the currency you want)
